
We’re excited to announce a new feature in Clarius Ultrasound App 8.0 that will enable radiologists, ENTs and endocrinologists to appropriately classify thyroid nodules when using high-frequency ultrasound. Designed to help prevent unnecessary interventions, our new thyroid preset now includes an advanced measurement package that correlates to the American College of Radiology (ACR) TI-RADSTM risk stratification system.2
Remarkably, thyroid nodules are present in up to 76% of the adult population.1 According to the ACR, TI-RADS was developed to properly identify detected nodules – over 90% of nodules discovered incidentally are considered clinically insignificant and proven to be benign. Now, TI-RADS is considered a reliable and simple classification system for reporting and predicting thyroid malignancy.
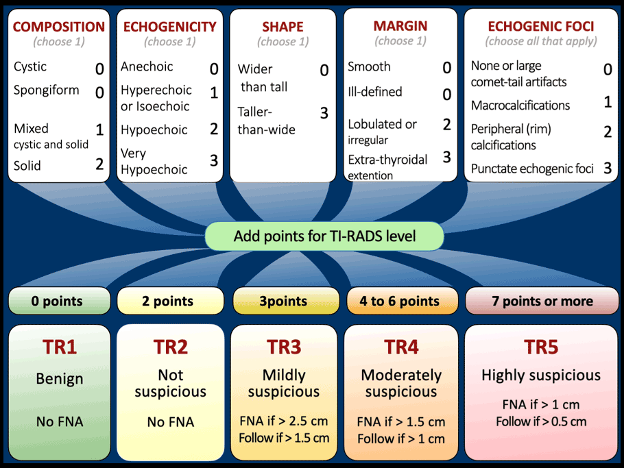
See the TI-RADS Workflow on the Clarius Ultrasound App
The Clarius ultrasound thyroid preset enables measurement of thyroid nodules in three dimensions. As specific indications for each nodule are populated, an automatic TI-RADS score is presented.
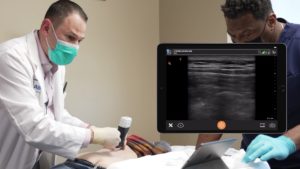
In this Clarius Classroom video, Dr. Oron Frenkel, MD, performs a diagnostic thyroid exam using the Clarius L15 HD linear ultrasound scanner. In under a minute, you’ll see how he quickly finds and measures the nodule, captures information about the nodule in the reports section and gets a TI-RADS score indicating the nodule is benign.
Watch a Thyroid Scanning Demonstration with Clarius Ultrasound
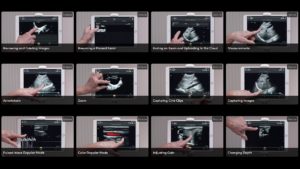
In this Clarius Classroom video, Esther Donohue B.S., RDMS, RDCS, RVT, shows us how to complete a thyroid exam using the Clarius L7 HD handheld ultrasound scanner.
- Start on the right side of the thyroid, go to the mid-portion, and take a measurement of the width of the thyroid.
- Press the measurement tools in the bottom left-hand corner of the screen. Select distance to measure the width of the gland.
- Then turn the scanner to a sagittal plane, find the mid-portion of the thyroid, go to the measurement tools on the lower left-hand side of the screen, and measure the length and the AP measurements.
- Next, fan the scanner, medially, for the medial portion of the thyroid and take a picture.
- Then go to the lateral aspect of the thyroid and take a picture.
- To complete the right side, go to the transverse plane by turning the scanner and sweep from inferior to superior.
- Once you find the inferior portion of the thyroid, take a picture and move up to the mid section. Record a picture and then scan to the superior portion of the thyroid. That will be the final picture of the right side of the thyroid.
- Once you’re completed the right side, proceed to the left and obtain the same images on the right.
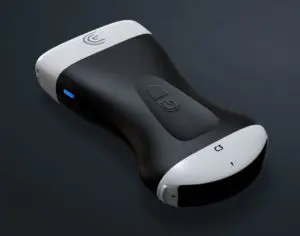
Clarius Is the Ideal Ultrasound System for Scanning Small Parts
Ultra-portable and with high quality imaging, the Clarius L15 HD linear ultrasound scanner is ideal for office and mobile practices. You’ll get sophisticated measurement packages, free cloud storage and reporting for a fraction of the cost of a traditional laptop or cart-based system.
We invite you to book a demo with a Clarius sonographer to learn more.
If you’re interested in seeing more ultrasound video tutorials on Clarius Classroom, we invite you to subscribe to our Facebook, Twitter, LinkedIn, Instagram or YouTube channel for alerts.
References

