
A report by the American Society of Plastic Surgeons indicates that $16.7 billion was spent on cosmetic procedures in the United States in 2019, with office procedures up 4%. Contrary to what we would expect in 2020, Plastic Surgeons are reporting a bigger demand with patients having more time for post-surgery recoveries while working from home.
With the growing popularity of plastic surgeries, there has been a corresponding increase in negative press about procedures that have gone wrong. To increase safety and mitigate risks, leading surgeons including Dr. Marc Salzman are using high-definition ultrasound in their office practices.
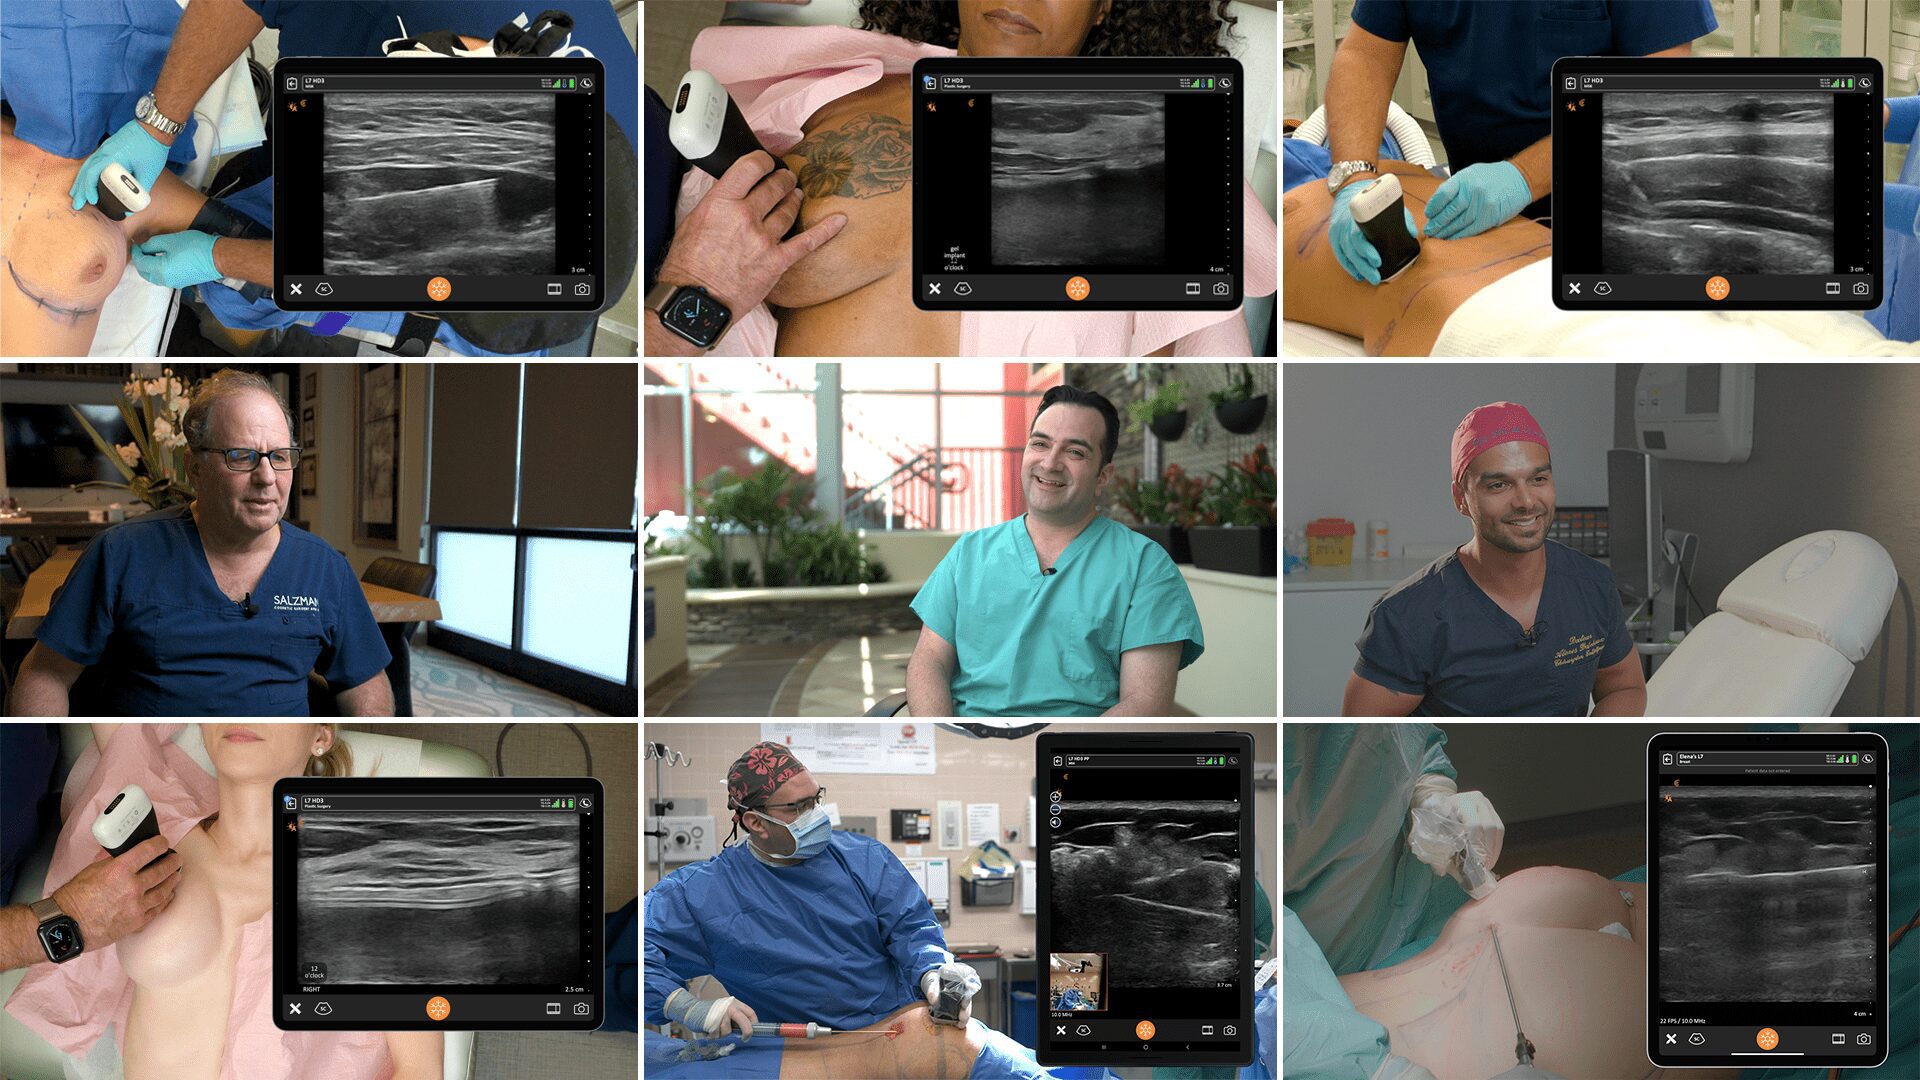
We invited Dr. Salzman, a double-board certified plastic surgeon, award-winning educator and Clarius user, to share his expertise during a one-hour webinar. He shared three case studies and discussed the challenges he avoids daily by looking under the skin with handheld ultrasound. You can now watch the webinar recording here. Or read on to learn what Dr. Salzman says about using handheld ultrasound for implant surveillance.
As a plastic surgeon, why do I want to use ultrasound for implant surveillance?
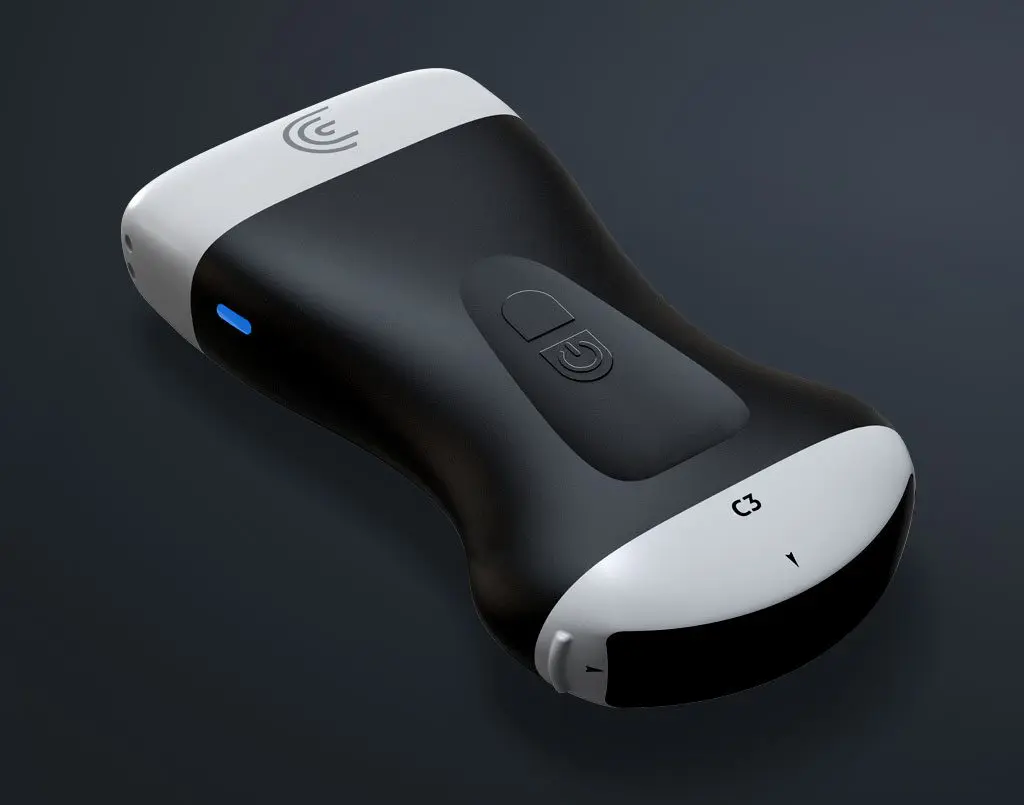
If you have a little handheld device like I have, it’s readily available. It’s either in your pocket, or it’s sitting in the room that you’re in with the patient.
MRI, which we’re used to using as plastic surgeons, is very costly. In Louisville, it costs between $1,500 and $2,500 per exam and it’s inconvenient. The patient has to travel to a completely different location. It’s usually a two-hour ordeal.
For me and others who have embraced using these newer high-resolution ultrasound devices (HRUS), scanning with ultrasound in the office has proved to be very accurate and cost-effective for the diagnosis of ruptured implants. We don’t charge our patients for these exams. But if we did, it would probably be in the $100 to $200 range, instead of $1,500 to $2,500.
The FDA is now recommending that ultrasound can be used instead of MRI because it’s so much easier for us to use and it’s cheaper for our patients. It’s considered the best first-surveillance tool for breasts.
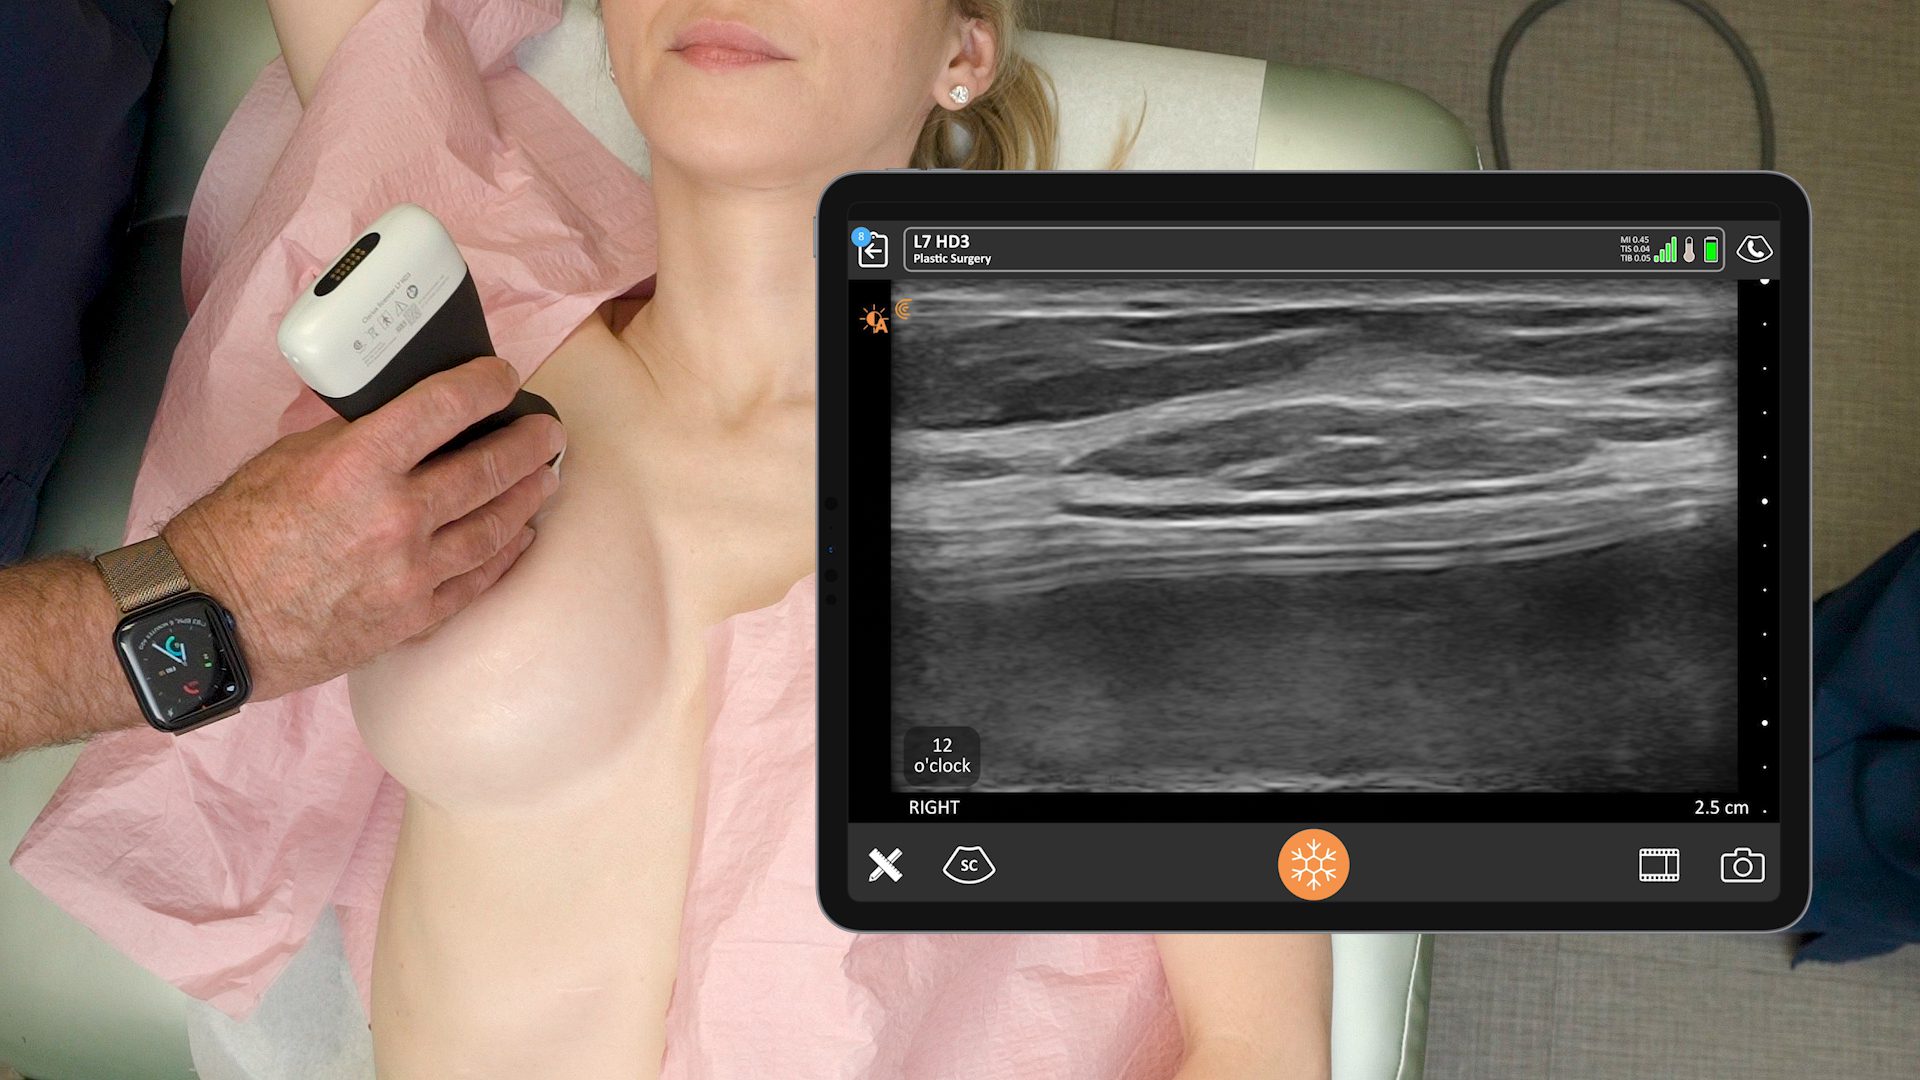
My process for a breast implant exam in the office:
- I use the same process for breast implants that are for reconstructive or cosmetic purposes.
- To start, image all four quadrants of the breast with ultrasound starting at the nipple and working towards the periphery.
- If I see something that’s suspicious, I compress the opposite side of the breast to unfurl the fold of the implant to show it’s not broken. This takes practice.
- You can annotate the images when you take them. Use arrows to indicate where it’s broken or if there is a seroma. What’s nice about the Clarius system is that I can save the images to the Cloud and come back to annotate the images. I might put an arrow and say it’s broken, but I normally annotate in the Cloud.
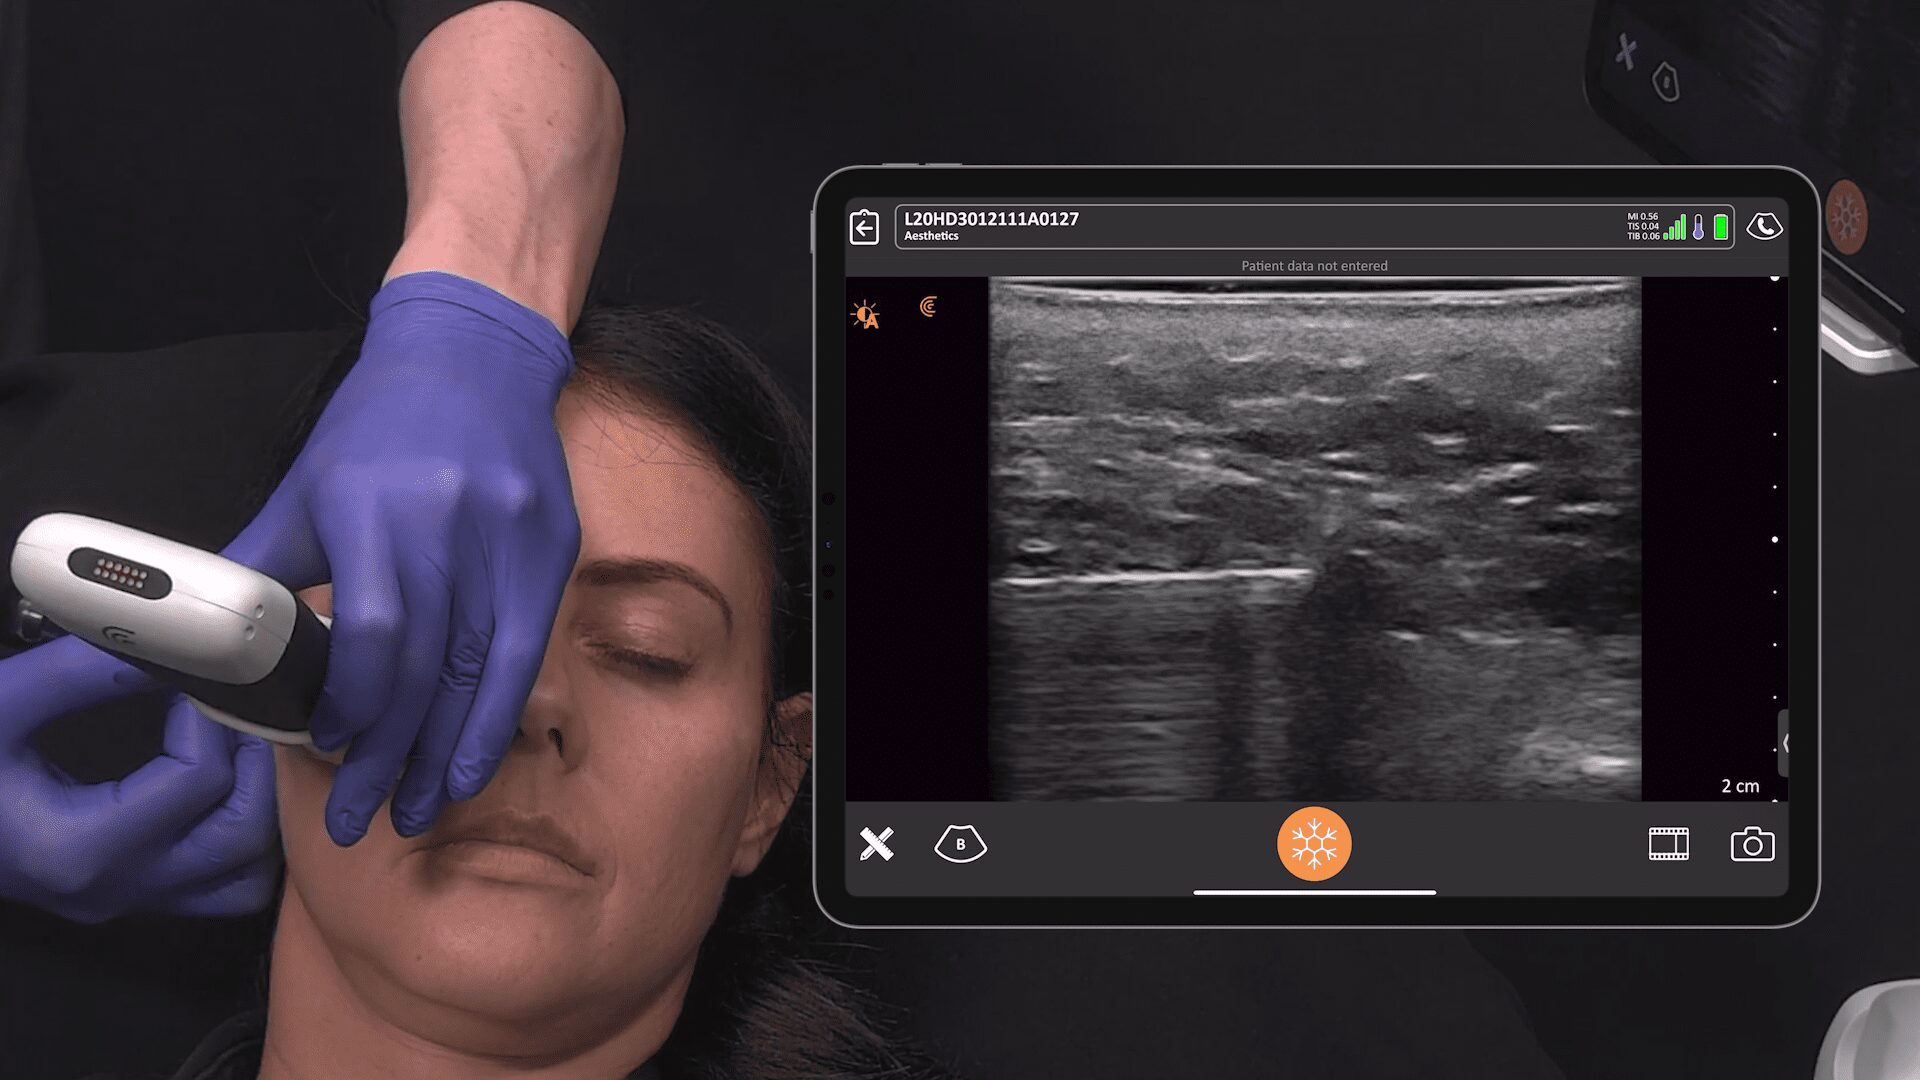
Setting Up for the Exam
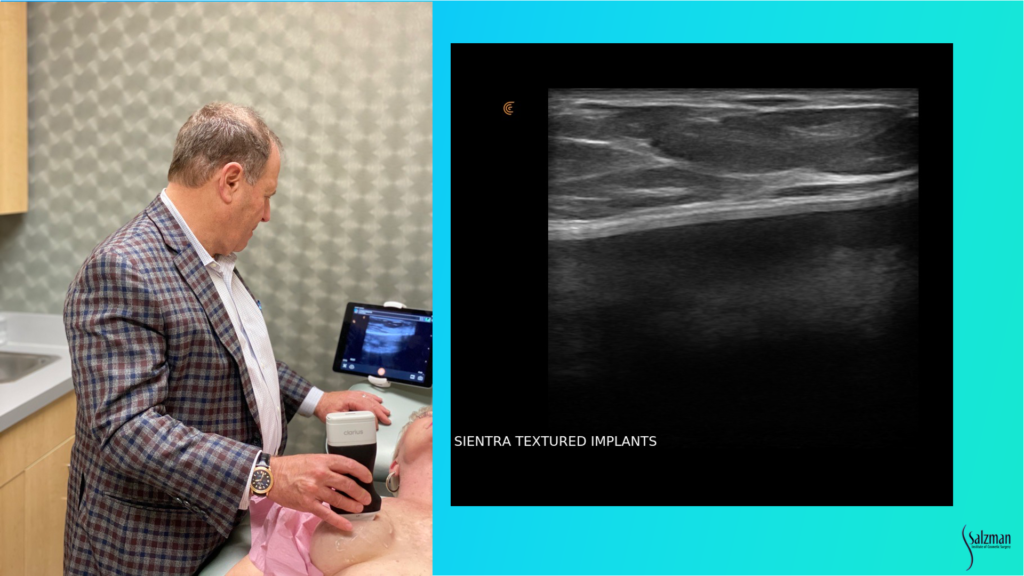
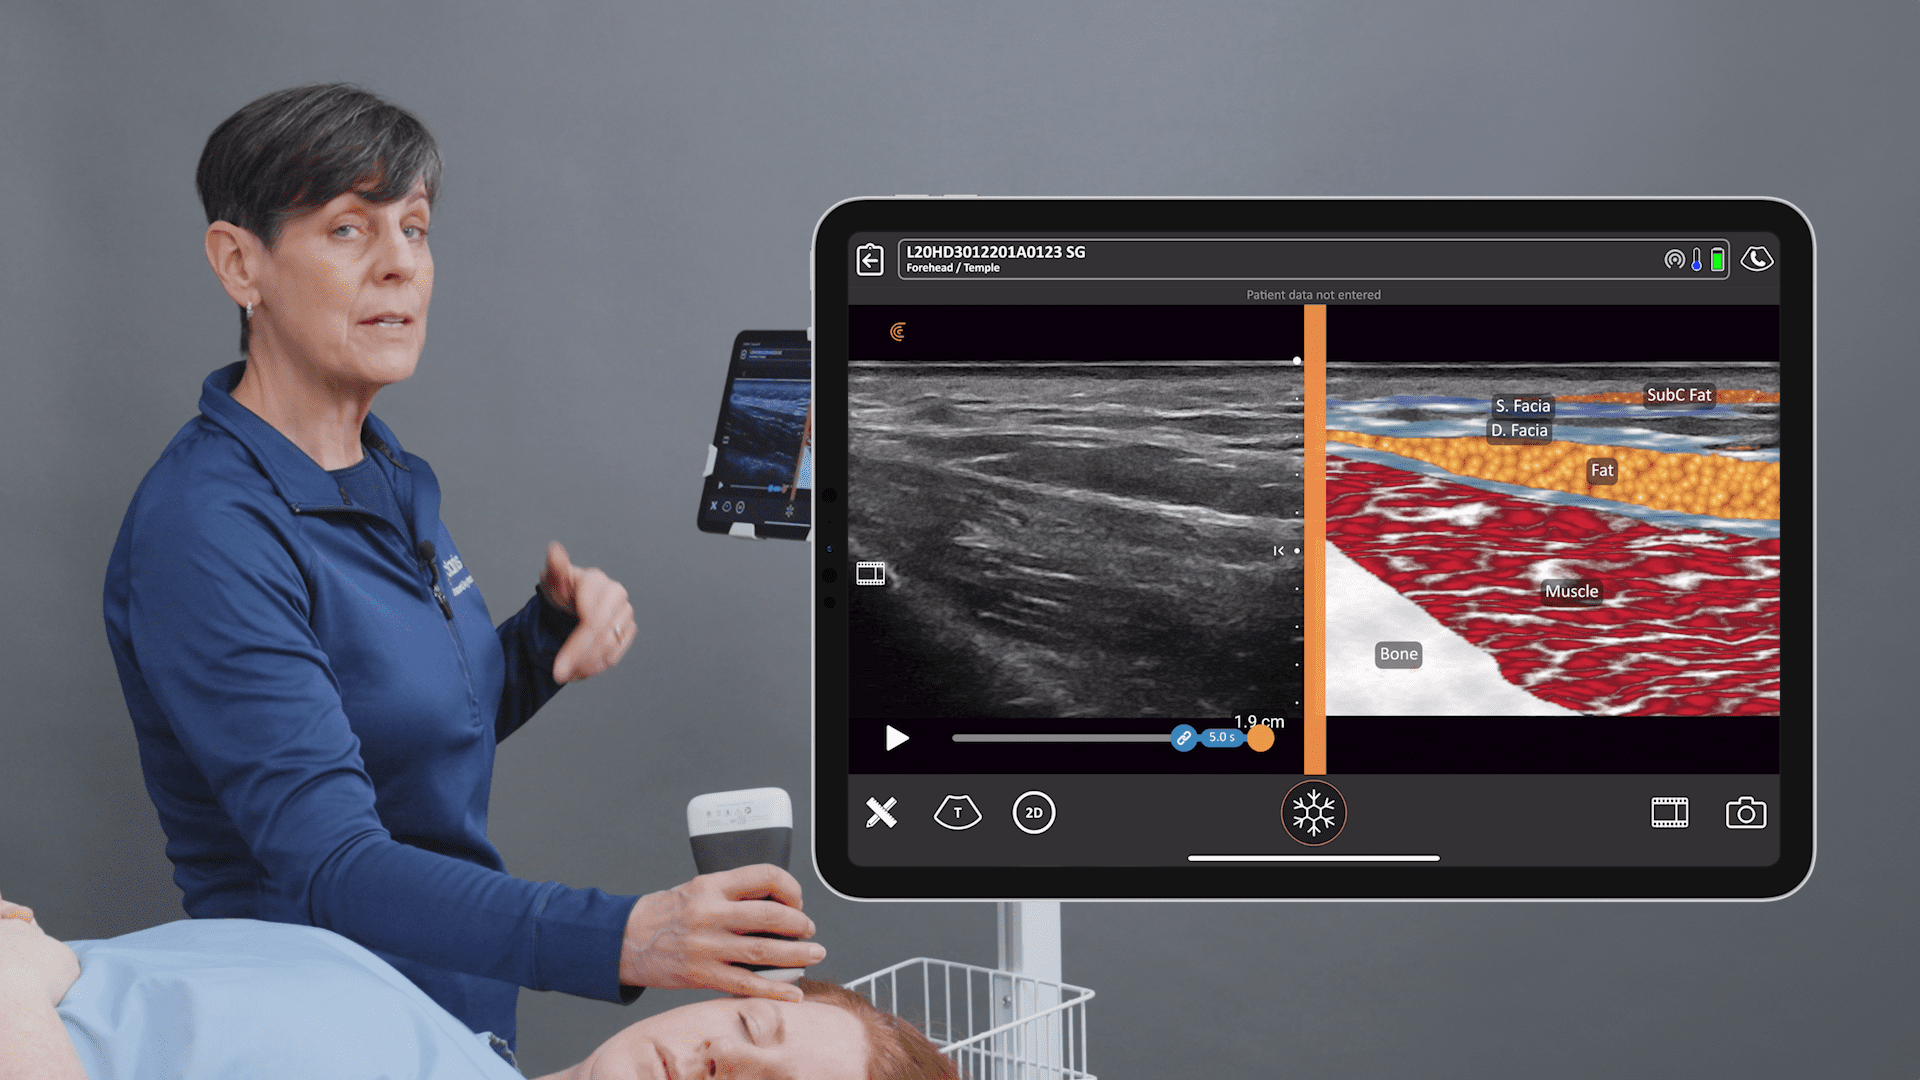
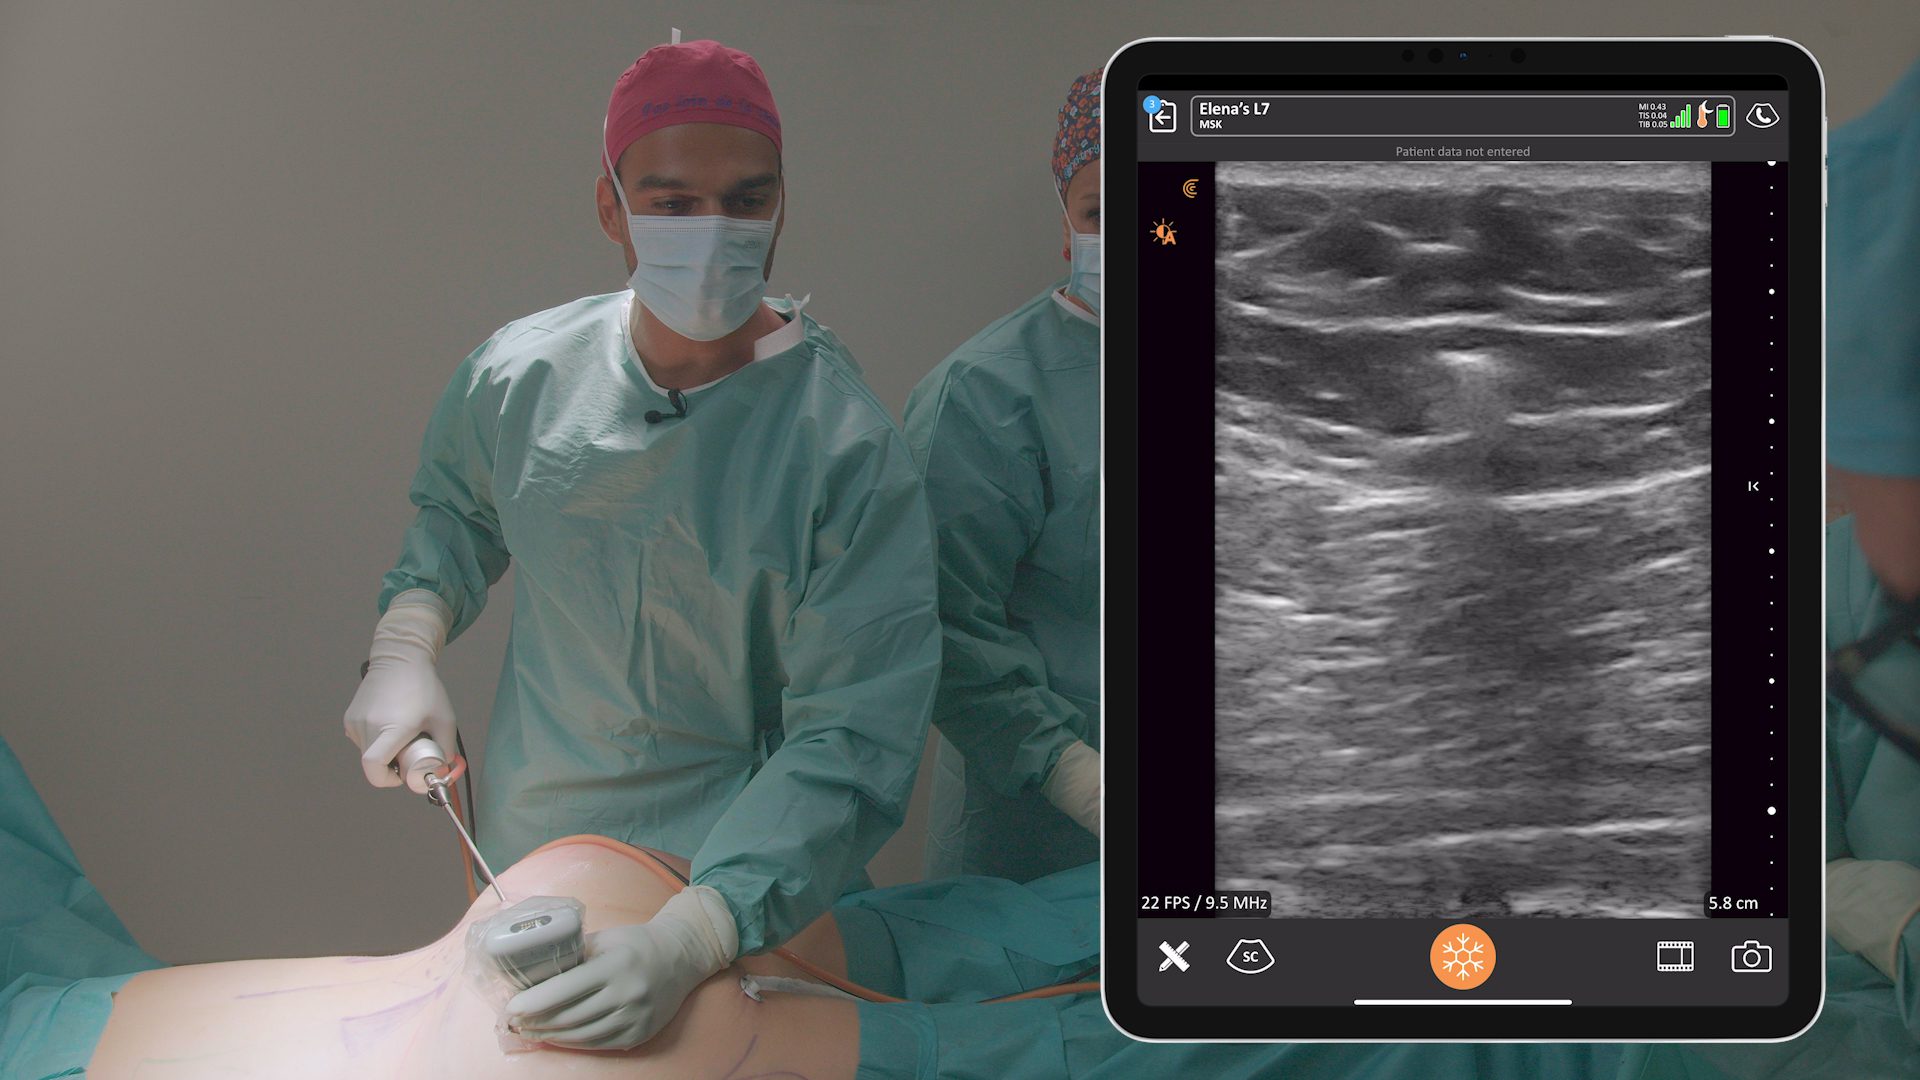
This is my setup in a regular exam room. I’m using the new Clarius L7 HD device with an iPad. I bought a bracket online for under $100 and hooked it to the back of the chair so that I can touch the screen if I need to. But I usually use the buttons on the device instead of touching the screen. I’ve programmed the bottom button to freeze the image and the top button to save the image. To record a video, I push the bottom button and a little icon appears that looks like a movie camera – it will take a 10-second video and stores it on the iPad and then upload it to the Cloud at the end of the exam. It’s very simple to do from the room.
Recognizing a Normal Textured Breast Implant
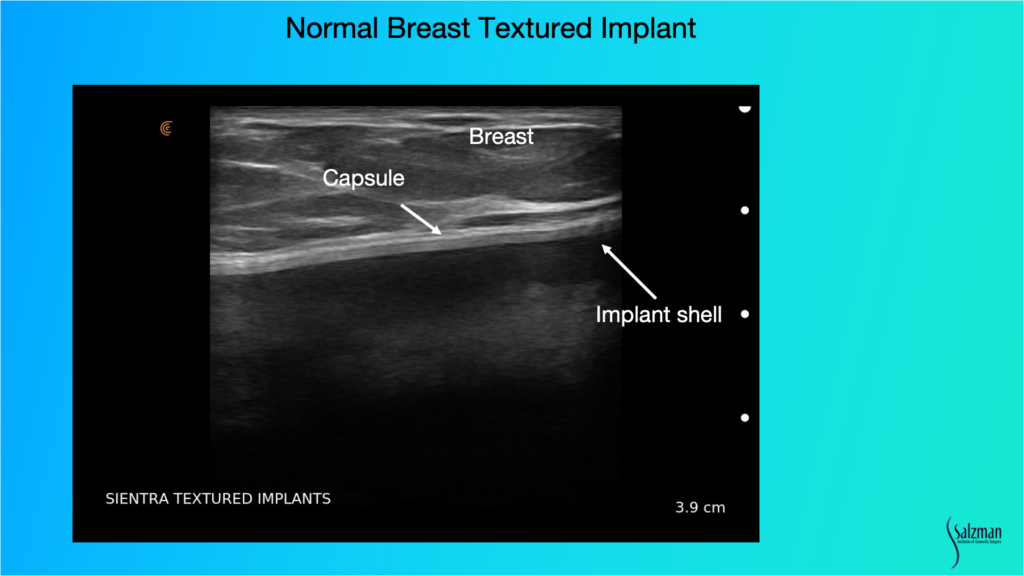
When looking for pathology, we have to know what normal looks like. This is a Sientra textured implant. You can see the breast parenchyma up above where it says breast, so it’s skin, a little bit of subcutaneous fat and then the dense white breast parenchymal tissue with those little striations, which are the support structures. And then the white line that’s just underneath the parenchyma, or under the muscle if it’s a submuscular implant, is the capsule. Usually, the implant shell is a bilaminar structure. And when you look in really high definition, sometimes it will look like it has three different lines, with the fourth line being the capsule that’s just above. That’s a normal, unbroken implant.
Comparing Smooth vs Textured Implants
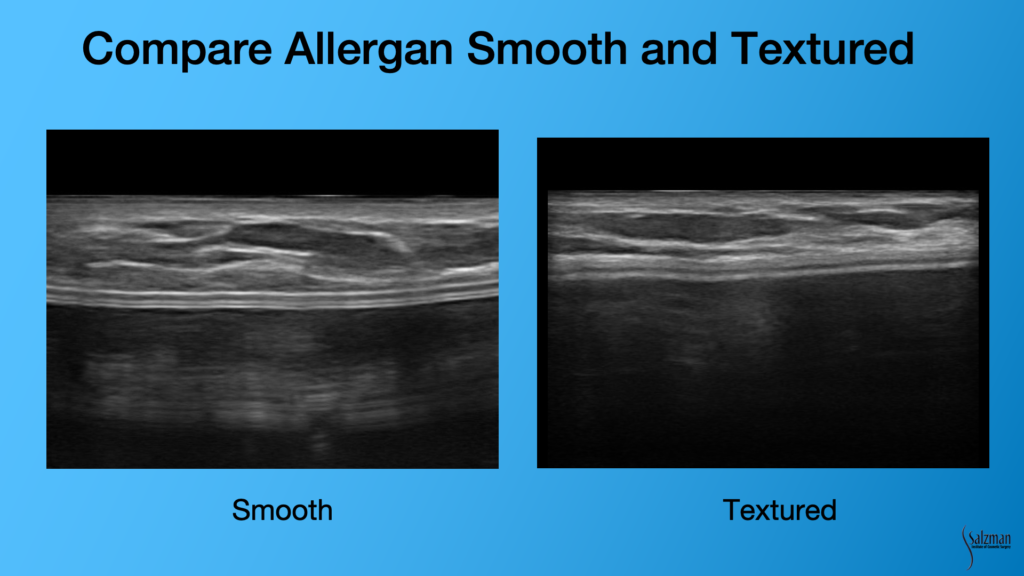
You can tell the difference easily between a smooth and textured implant. Sometimes the patients don’t remember which surgeon placed the implant and they can’t tell you if it’s smooth or textured or what brand of implant they had. You can tell with ultrasound. The implant on the left clearly has a more smooth, bilaminar or railroad track sign. The image on the right looks almost out of focus because of the fuzzy surface of a textured implant. Inside the implant, sometimes you’ll see what we call reverberation artifact. They are these white lines that look like the shell. Often, they are almost the whole length of the image, and they repeat one another. And that’s non-pathologic. You’ll see that a lot of the times inside – it won’t be a totally anechoic structure of the gel.
Case Review: 46-year Old Woman with Silicone Gel Implants
I recently examined a 46-year-old woman with silicone gel implants. She had them inserted eight years ago and was concerned about ALCL because she knows there’s a recall for some type of implant. She knows that the right side looks a little bit distorted compared to the left. She doesn’t know what type of implant she has or who performed the procedure. In this situation, I know I’ll have to look for myself.
Looking at her from the oblique view, I could clearly see some elongation on the left side. It looks like it’s a stretched out inferior pole. The right side looks totally different. The patient reported that the implants looked good for the first two years. After eight years, we know there’s some degree of likelihood that it’s broken.
On physical exam, they were both soft as butter, grade one capsules on both sides. But there was some bottoming out, if you will. The incision, which you can barely see in the bottom part of the left breast, has migrated up away from the inframammary crease, so she’s had some stretch of the inferior pole, and there’s obvious asymmetry of size.
So, here’s what I need to know at this point: Is the implant smooth or textured? I don’t know, and she doesn’t know. Is the implant broken? I don’t know and she doesn’t know. And is there a seroma present? Well, I can’t tell just by looking at it.
I found the answers with my high-resolution ultrasound. Without an ultrasound in the office, I would have sent the patient for an MRI, which would take at least a week. In situations like these, it’s best to get the patient to the operating table quickly.
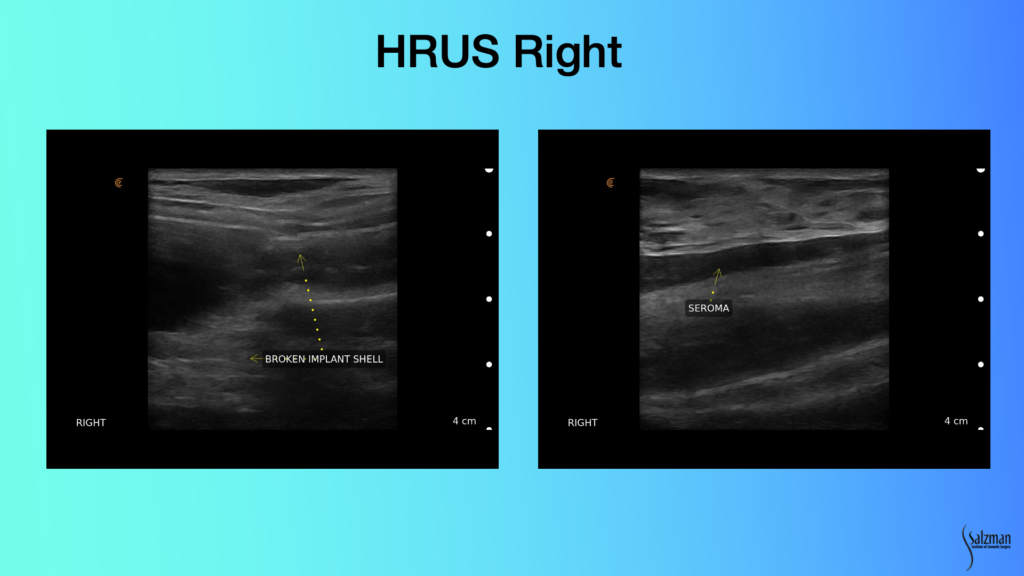
Looking at this implant with ultrasound, you don’t have to be a rocket scientist to know that this image on the left does not look like what I just showed you as a normal implant. The railroad tracks are not straight anymore. There’s a bend right and it’s disheveled looking. And there’s stuff that looks like a snow, which is free gel. It’s called a snowstorm pattern of free gel. And you see little fragments of gel of the elastomeric shell that are embedded inside the material, which should be on the inside of the implant.
And then we see this hypoechoic area which is fluid. Fluid is black, or hypoechoic. It doesn’t produce many echoes from the ultrasound. The right side is broken and has a seroma. This is clearly a textured implant because it doesn’t have that smooth appearance that we saw in the previous slide. With a seroma on eight-plus-year-old silicone gel implants that are textured, we’ve got to start worrying about ALCL.
If you look at the scale of this seroma, it’s less than a centimeter. It’s going to be hard to put a needle in this. In Louisville, you need 10 cc of fluid to get cytology sent. There’s no way I’m going to get 10 cc out of this lady, so I’m not even going to try and aspirate. Because it’s already a broken implant, and it’s eight-plus years old, we’re going to the operating room, which obviates the need to send her for an MRI that’s confirmatory.
First of all, I’m 100% sure I’m right. I know it’s broken. I don’t need an MRI. And I don’t need to send her to a radiologist for another $1,000 to tell me that he can’t aspirate it. And if he does, he’ll only get 3 cc. It would be a waste of time. So, I scheduled her for surgery, which she’s much happier with.
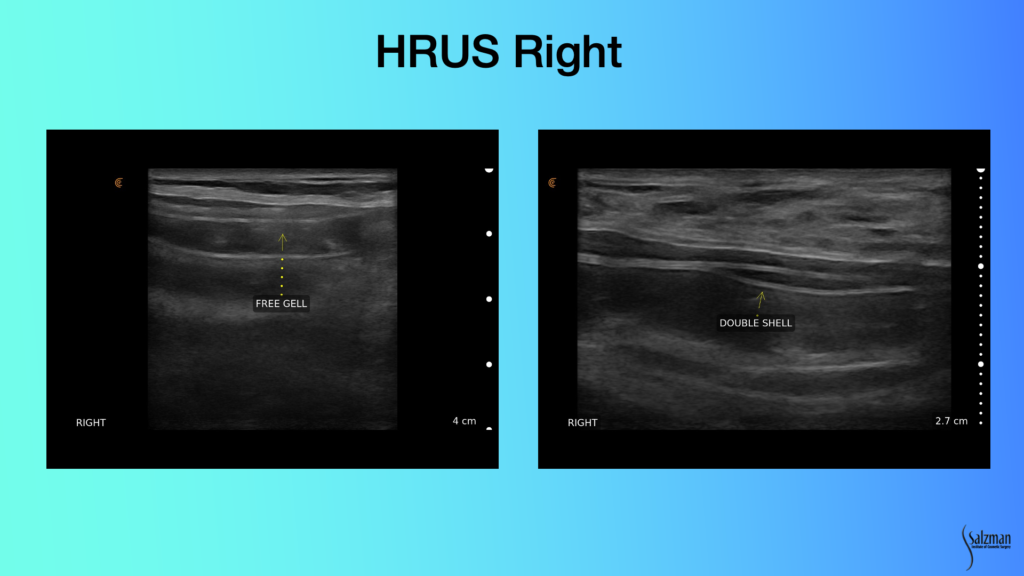
On this left image, you have a double super imposition of the elastomeric shell, with free gel in between, pathognomonic for a broken implant. Same thing on the right. You have double Y-shaped shell like this, and this could be that it’s upside down, if this was not bilaminar. But when they’re both bilaminar with that’s invagination of a broken shell on itself. You’re seeing the shell below the shell. These are both pathognomonically broken implants. You’re never going to miss that with ultrasound.
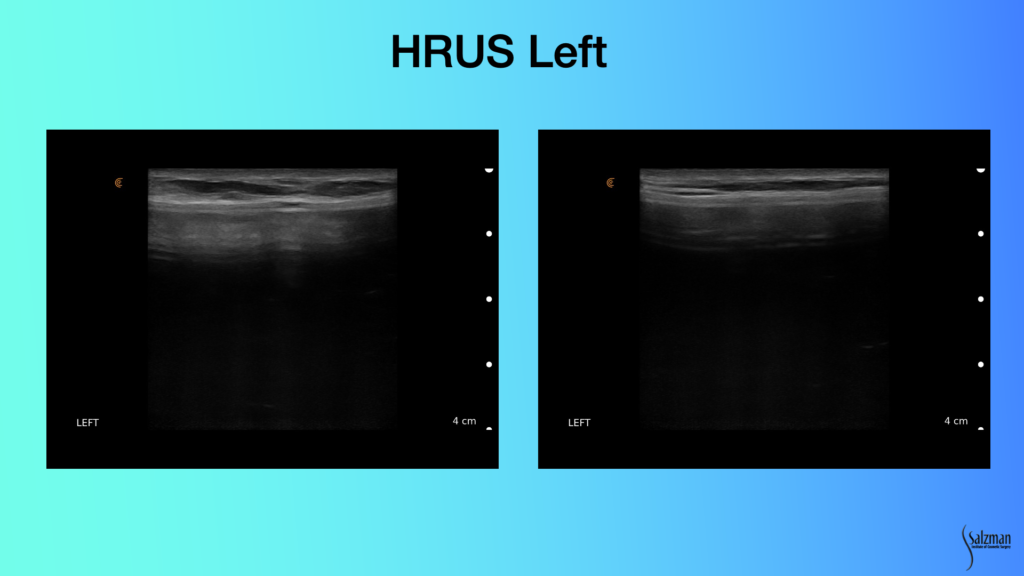
In contradistinction, look at what we see on the left with our patient. Inside, you still have this cloudy looking material. I don’t think this one’s broken. But looking at the elastomeric shell, those lines are parallel and look pretty good.
The OR Plan and Execution
Because she had the implants eight years ago, I have to rule out ALCL. I plan to do a capsulectomy, because she has a seroma. The patient wants to be larger anyway. So, I plan to remove the capsule on the right. The left side was bottomed out. I plan to do a three-flap technique using the capsule and making a flap out of it to repair. I do an inferior capsulorraphy and a cephalic capsulotomy, and maybe a medial and lateral capsulotomy to enlarge the space for a slightly bigger implant.
And that’s what we did. We did a right capsulectomy, an inferior capsule, a fascial flap capsulorraphy, cephalic and medial capsulotomies, and we went to a smooth-walled device.

And here you can see this grossly broken implant. It looks just like it didon ultrasound. It’s in pieces, essentially, and so you have invagination of elastomeric shell within the goopy silicone gel. And here’s the opposite side which is an intact. It’s an Allergan 410, or a shaped implant. And that’s what happens with the stretch of the bottom half of the pocket. I always see that. Much more with the 468 or the saline version of the 410. But even with textured 410, you see that.
Patient Causes Post-Operative Complication
The only time I ever use drains for breast surgery is when I put in Strattice or I do a capsulectomy. So, in this case, I put a drain in. On day four the patient decided to remove her own drain. When she came to the office two days later, I was concerned she may have caused a seroma. With ultrasound, I was able to see a little tiny bit of fluid, which I decided to watch. I examined her again with ultrasound about a week later, and the fluid had been reabsorbed.
If I didn’t have ultrasound, I would have sent her to a radiologist for another $1,500 exam and aspiration. He would say he’s afraid to put a needle in because it’s an implant. With ultrasound, I know that I can stick the seroma and not stick the implant. I can see it. It’s so easy.
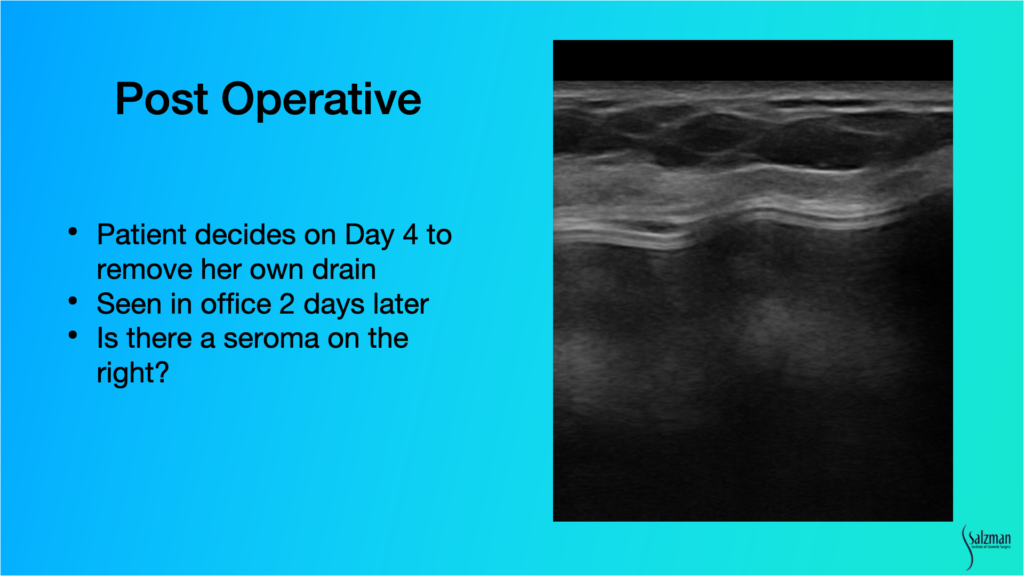
In summary, high-resolution ultrasound allowed for an immediate, day of, consult diagnosis of both the seroma and broken implant. It led to a treatment plan that day. I scheduled an appropriate procedure and afterwards was able to use ultrasound to assess that when the patient decided to remove the drain, it was probably okay.
Dr. Salzman has been practicing in Louisville, Kentucky since 1992. He has taught medical courses to physicians and nurses and paramedical cosmetologists. Dr. Salzman lectures around the United States on his innovative techniques, and he lectures plastic surgery residents at the University of Louisville twice a month where he’s been twice voted Educator of the Year.
An ultrasound user since 2012, Dr. Salzman switched from a laptop ultrasound to the Clarius L7 HD in 2019. Read his article about why ultrasound is essential for every plastic surgeon.
To learn more about how easy and affordable it is to add Clarius HD to your plastic or cosmetic surgery practice, contact us today or request an ultrasound demo.

