
While the interscalene brachial plexus block is currently the more common and popular regional anesthesia technique for pain mitigation after shoulder surgery, the supraclavicular block is an effective, and possibly safer alternative.
According to a 2019 study published in the European Journal of Anaesthesiology, there is evidence that the supraclavicular block is less likely to cause hemidiaphragmatic paresis and Horner’s syndrome.
We recently invited Dr. Gregory Hickman, the Medical Director and Anesthesia Director at the Andrews Institute Ambulatory Surgery Center in Florida, to share his tips for performing a successful supraclavicular block using ultrasound guidance. Read on to learn about Dr. Hickman’s master technique.
Dr. Hickman’s Master Tips on Performing a Supraclavicular Plexus Block
“One of the first articles I read on doing regional anesthesia for the upper extremities was doing shoulder surgery with supraclavicular blocks for analgesia postoperatively back in 1989. So, a long time ago!
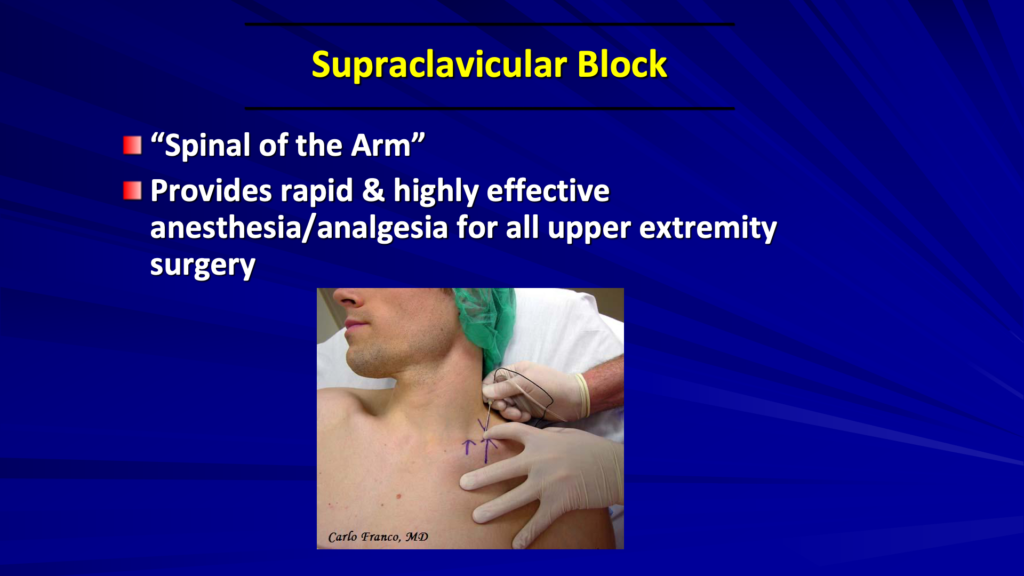
A supraclavicular block is very common for anesthesia. It’s often called the spinal of the arm because it works on the whole arm. It provides really rapid and effective anesthesia and analgesia for the upper extremity.
Identifying Anatomy of a Supraclavicular Block In Ultrasound Imaging
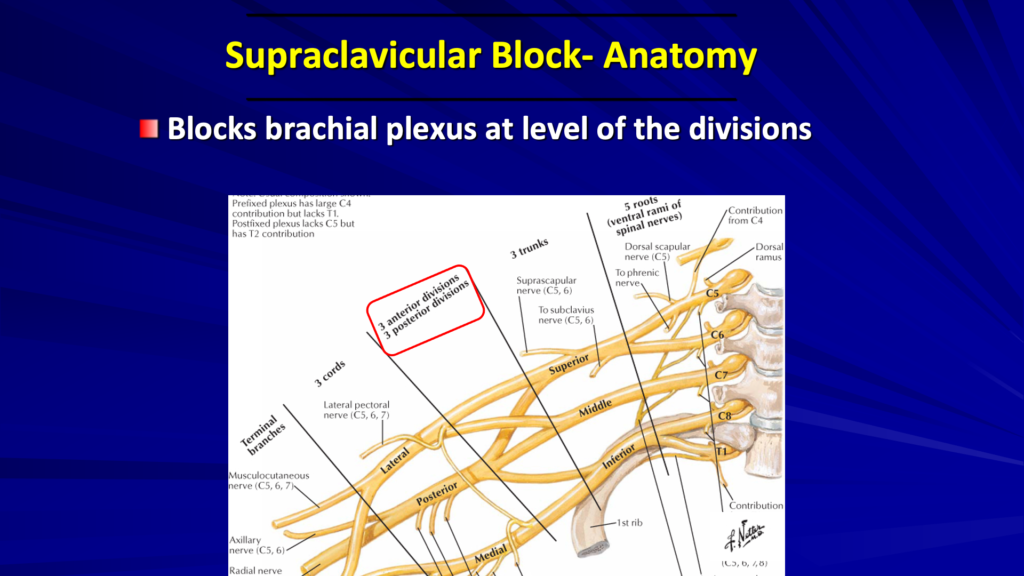
Let’s review our anatomy. In the picture above, we’re looking at the level of the divisions. For the supraclavicular block, we’re going to be right over the first rib, at the level of these divisions where the trunks divide.
Supraclavicular Block Technique Under Ultrasound Guidance
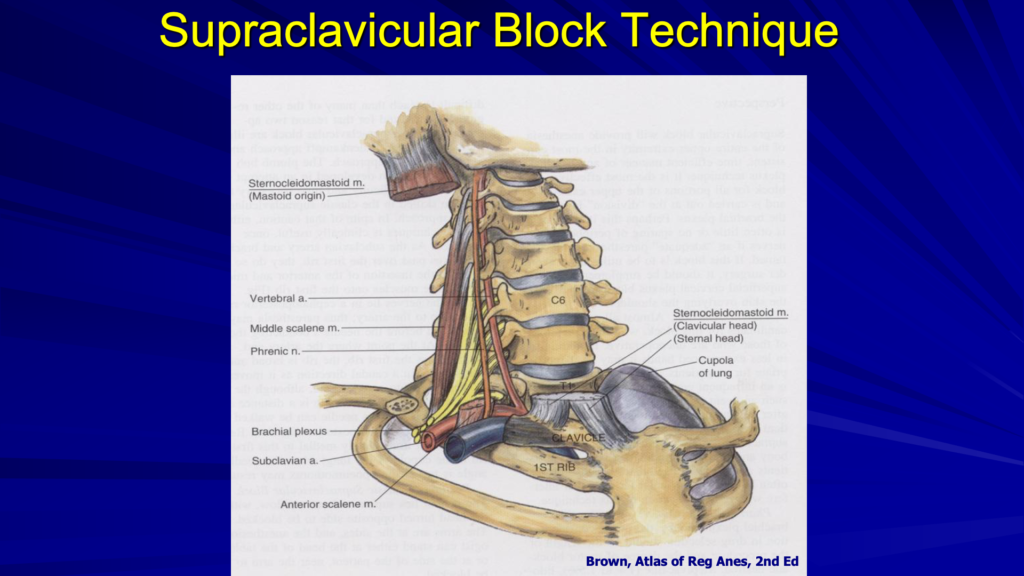
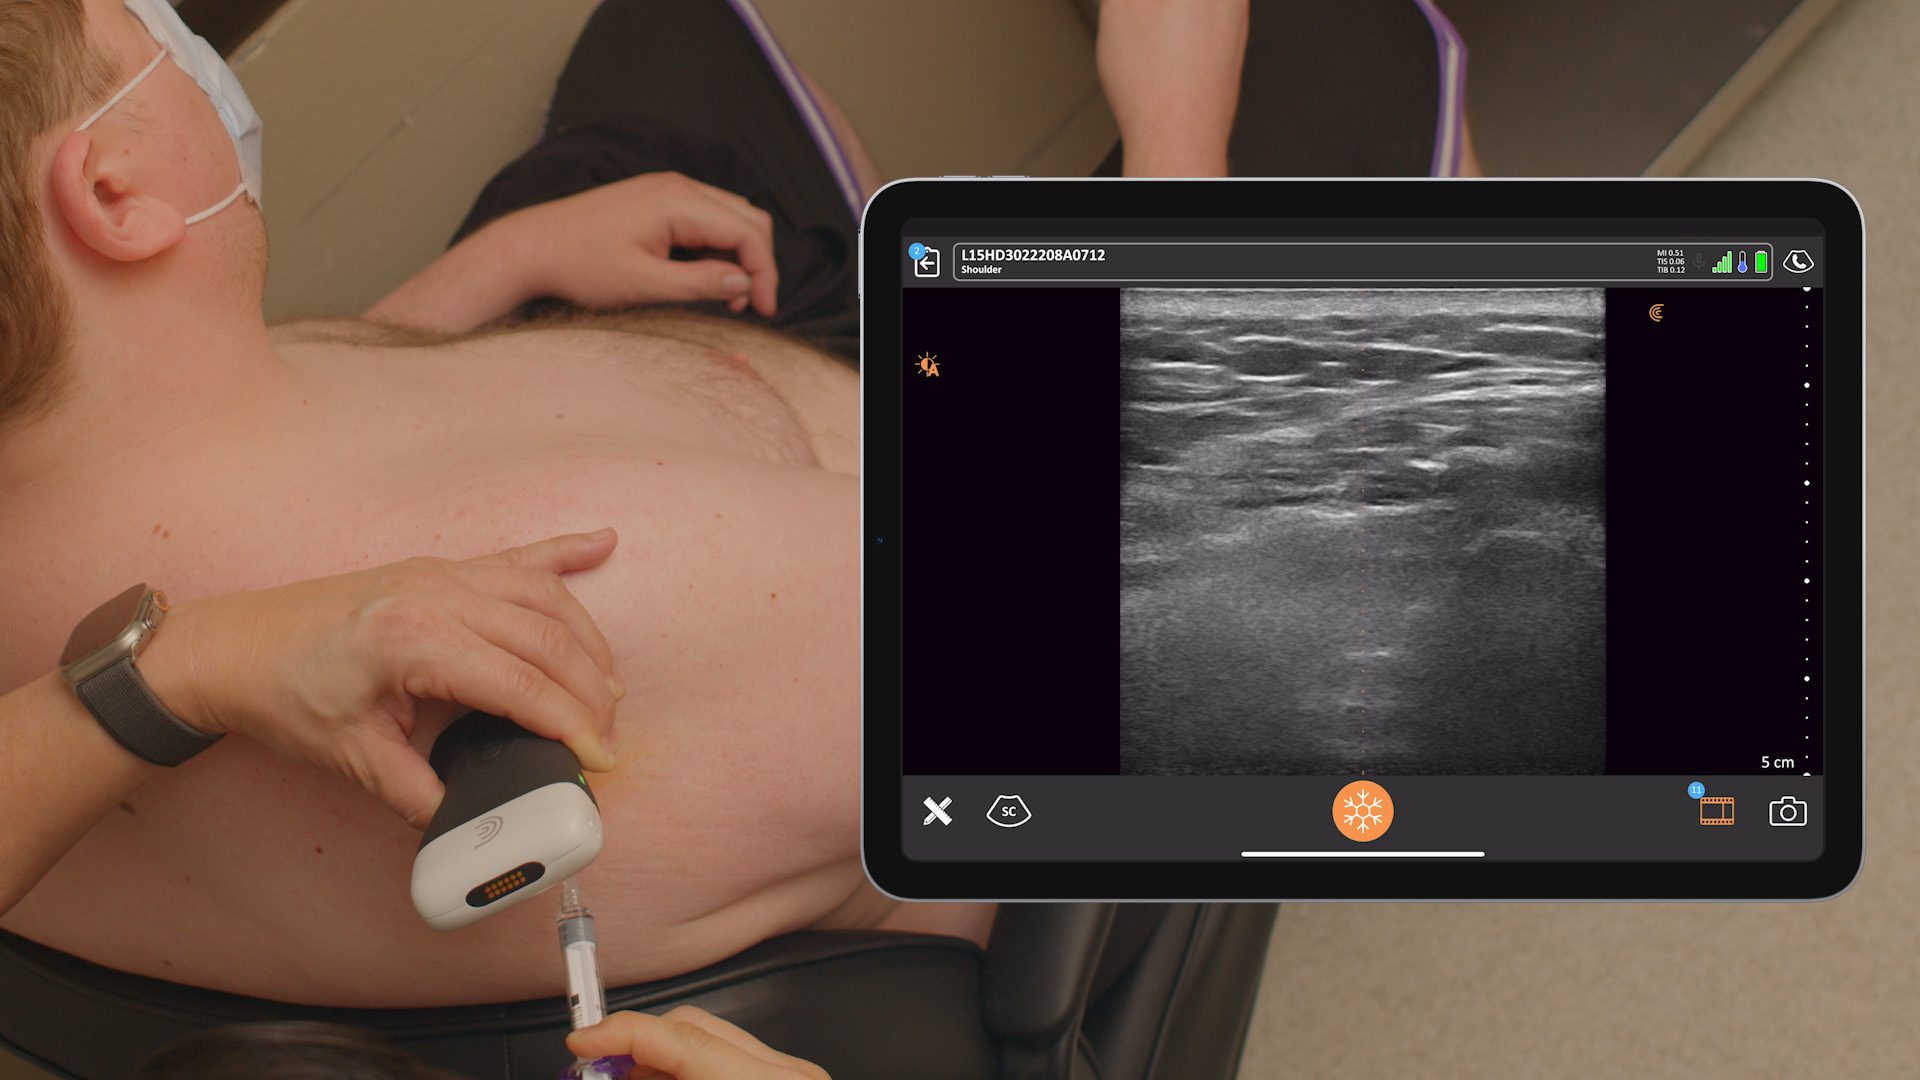
Here’s a different look at the anatomy. The first thing we’re going to find is the first rib and the artery. The interscalene brachial plexus is just posterior to the subclavian artery. The subclavian artery and the subclavian vein are just posterior and anterior to the anterior scalene muscle. The plexus is coming right over the first rib, just posterior to the subclavian artery and anterior to the middle scalene muscle.
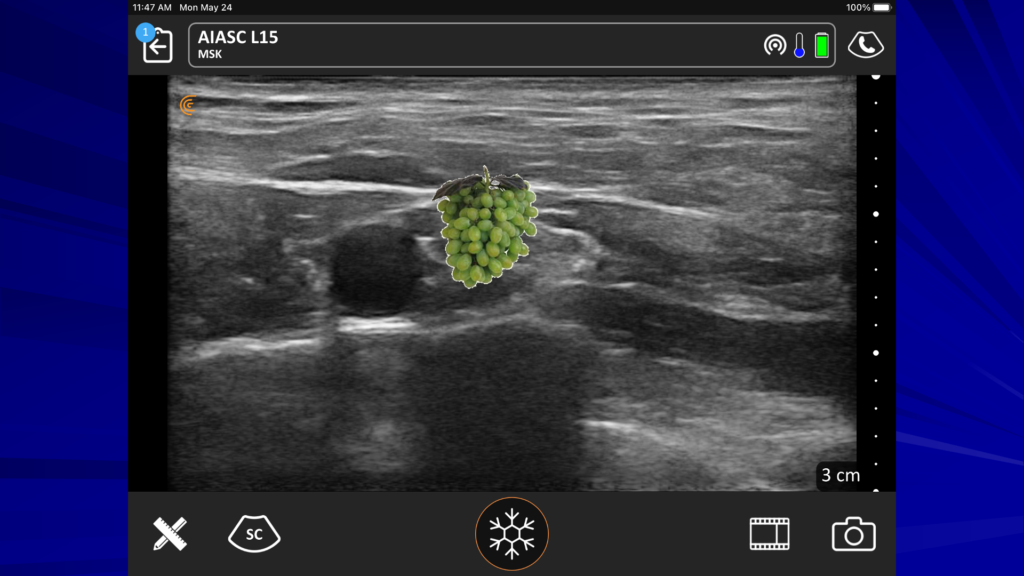
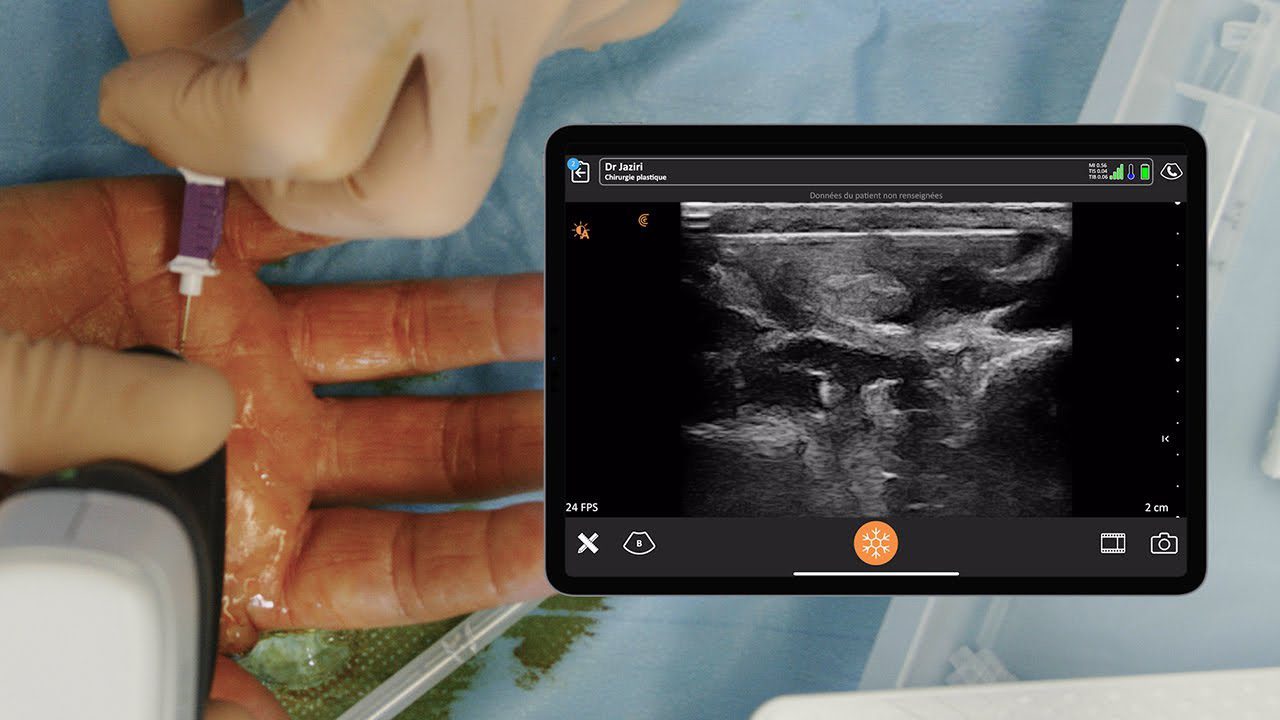
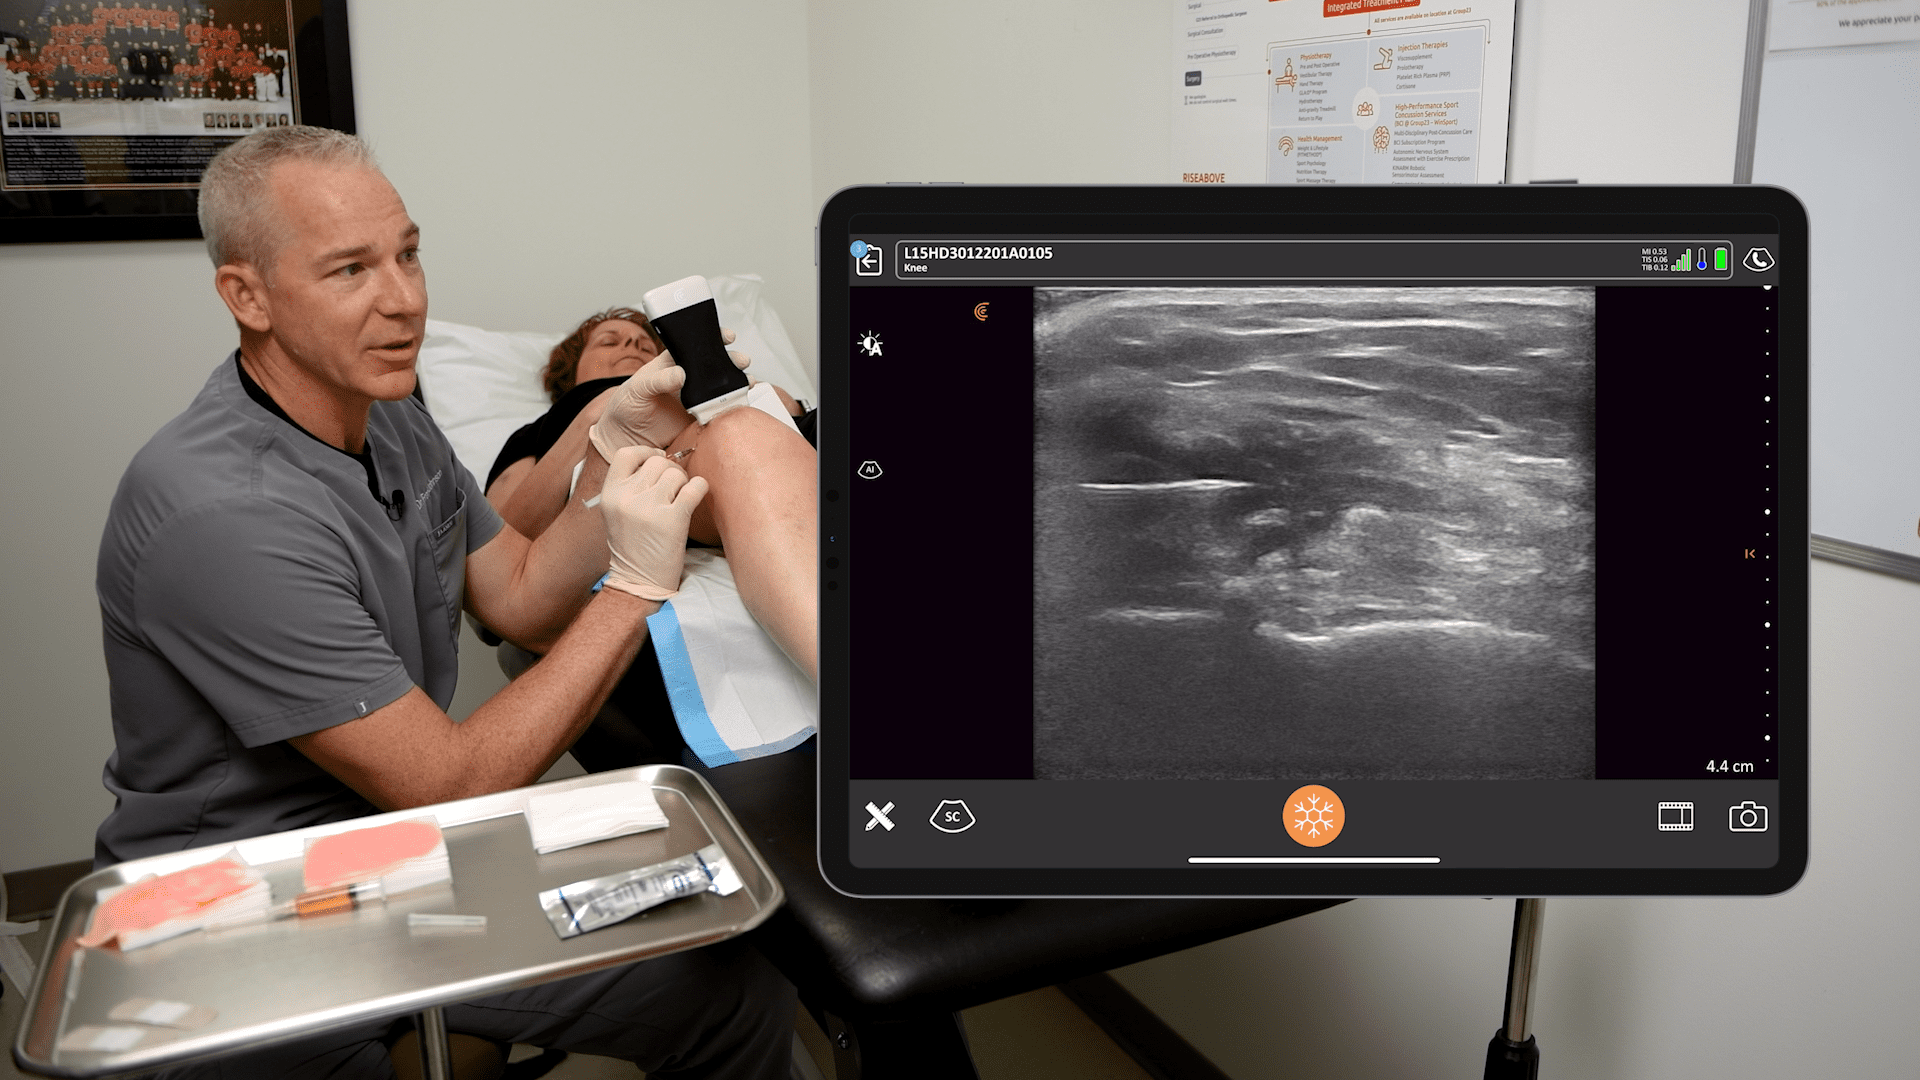
In the ultrasound image above, the dark area is deep to the first rib. That’s because bone prevents ultrasound from going through and it looks dark, deep to the bone. Above and to the left, you see the subclavian artery and we’ll see our plexus and nerves just to the lateral aspect of the artery or posterior. The pleura at the bottom of the image looks a little shiny. We want to use our rib to protect us from the pleura. The nerves look like a group of grapes, which you would see posterior to the artery. Below are three important steps when performing a supraclavicular block.
Preparing for the Supraclavicular Block
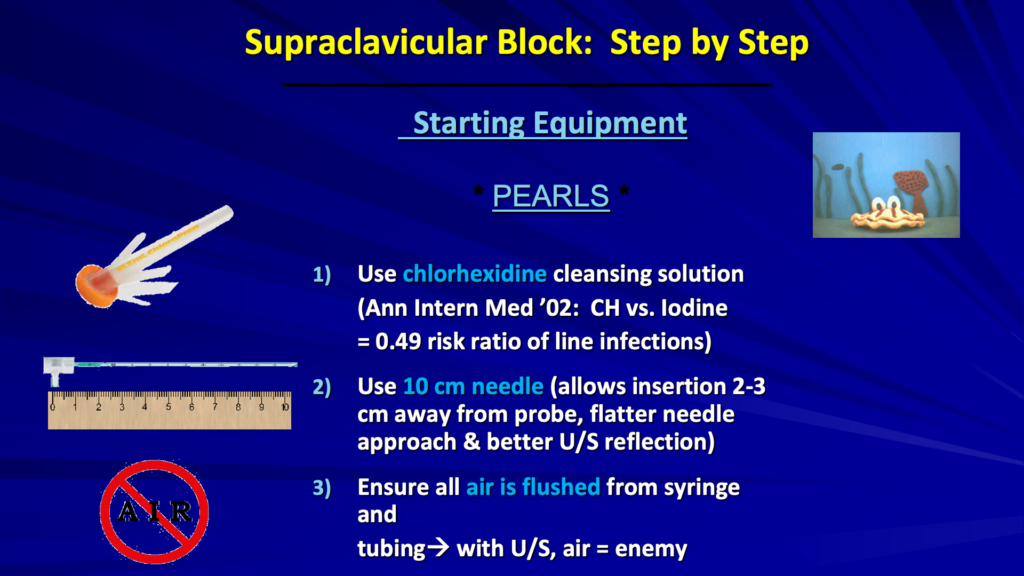
We use just a simple chlorhexidine solution and I like to use a long needle. I use a 10-centimeter needle for basically all of my blocks. This allows me to insert my needle two to three centimeters away from the probe.
MASTER TIP: You often see the needle going in right next to the probe, but I like to get a little away from the probe, which allows my needle to come in flatter, kind of parallel to the face of the probe. This gives a better reflection for your ultrasound image and it makes your needle much more easily visible.
Before you start introducing your needle make sure to flush all the air out of your line. We have a syringe connected to some tubing to the needle that makes sure all the air is flushed out, because you don’t want to start injecting air into your image. It’ll really mess up your ultrasound image.
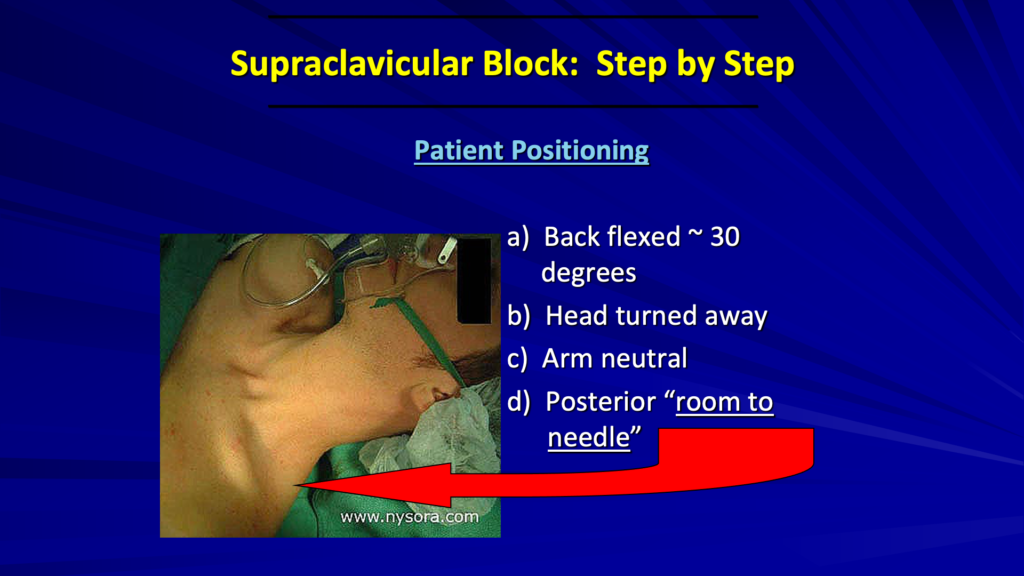
As far as positioning goes, since I’m doing blocks in the pre-op area, I have my patients on the stretcher. I can raise the back or the head of the bed up about 30 degrees for easier access. Have the patient’s head turned to the opposite side. We’re going to work on the left side here. So, we’ll have the head turned to the right.

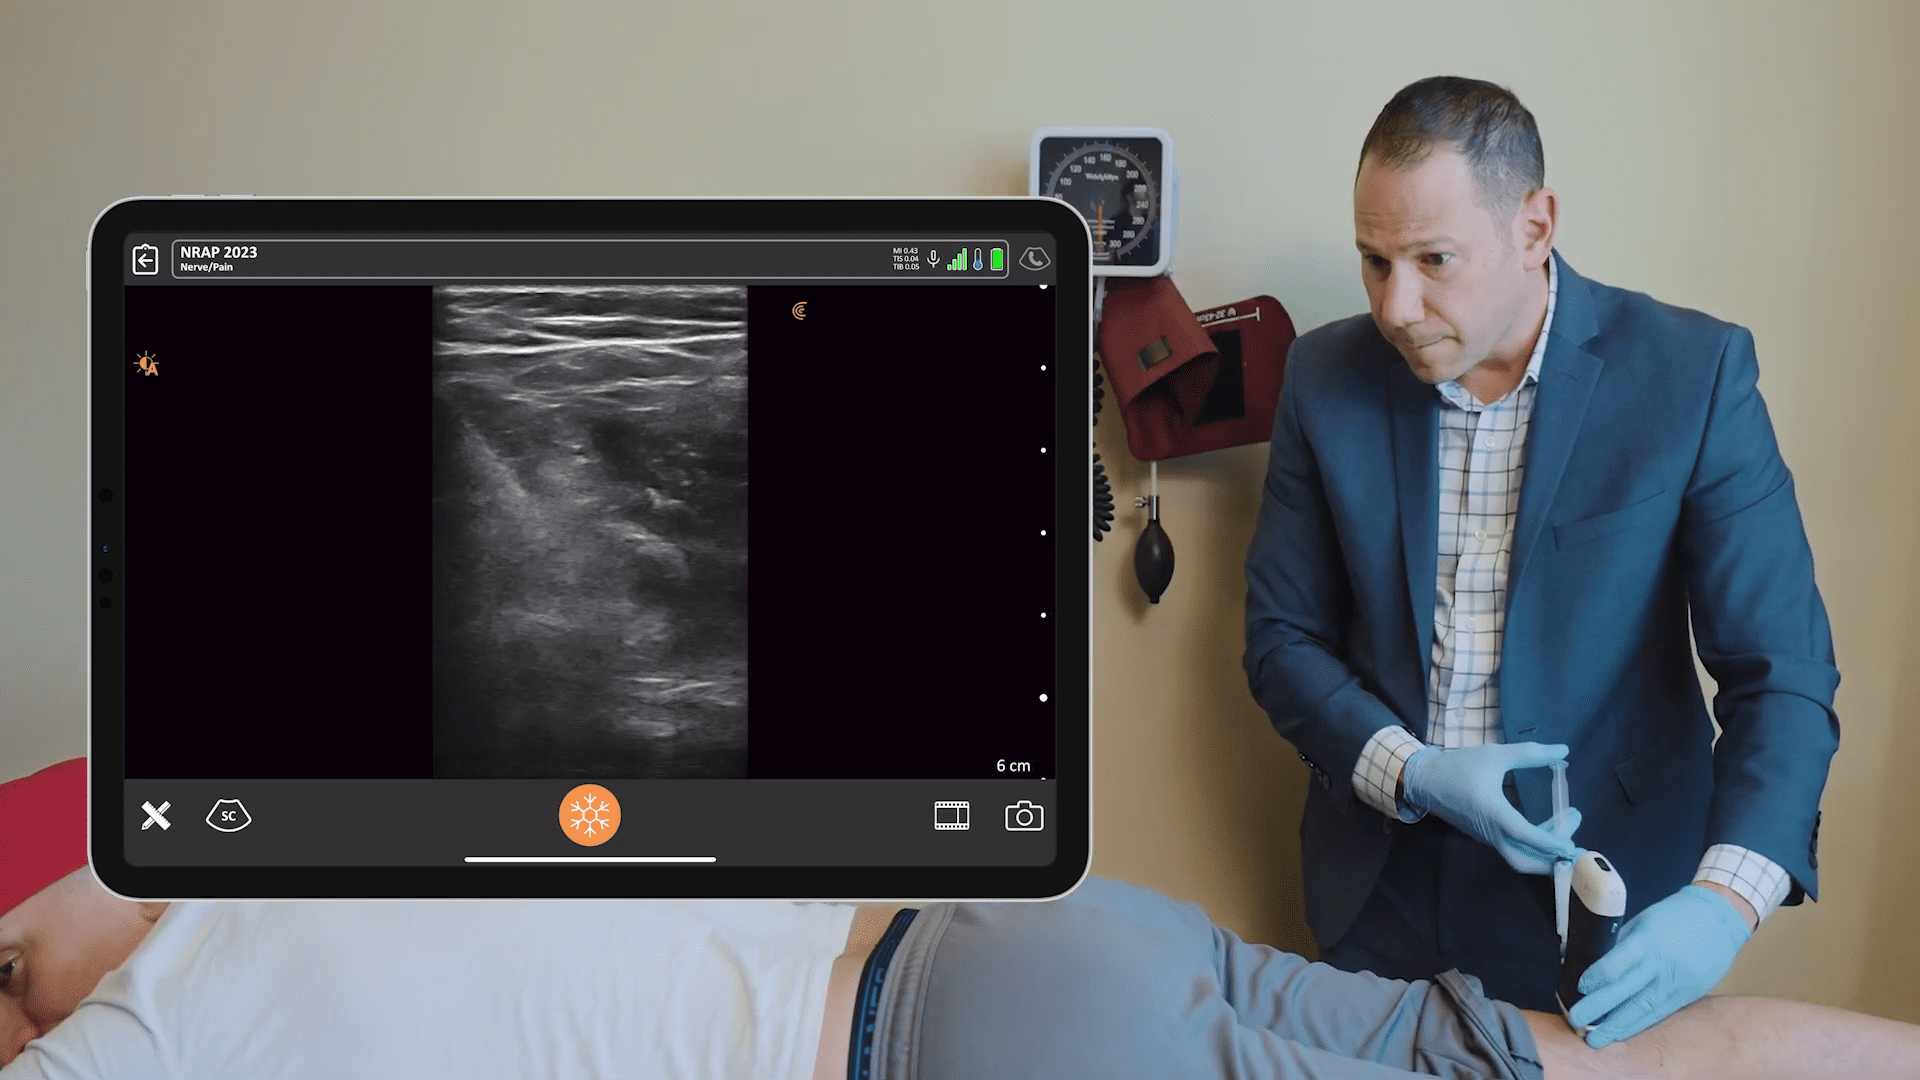
First, identify the clavicle and the sternocleidomastoid. Place the probe just posterior to the clavicle and aiming straight down towards the feet, down towards the toes and just lateral to the sternocleidomastoid.

The big trick is to rotate the lateral side of the probe away from the clavicle. We start right behind the clavicle and we rotate the lateral side until we get a good image of the rib. The needle shown in this image is a little closer to the probe than what I do, which I’ll show you next.
MASTER TIP: It’s often taught to go in at a steep angle, which is aiming towards the pleura here. If you come in from further away, it’s safer. By taking a shallow angle approach, there’s less chance to hit the pleura below the clavicle.

You can see on the left side of the image above that I’m coming a little bit away from the probe, kind of flat and that needle is going to be parallel instead of a steep approach when you come in next to the probe. We want to identify the rib and the subclavian artery first.

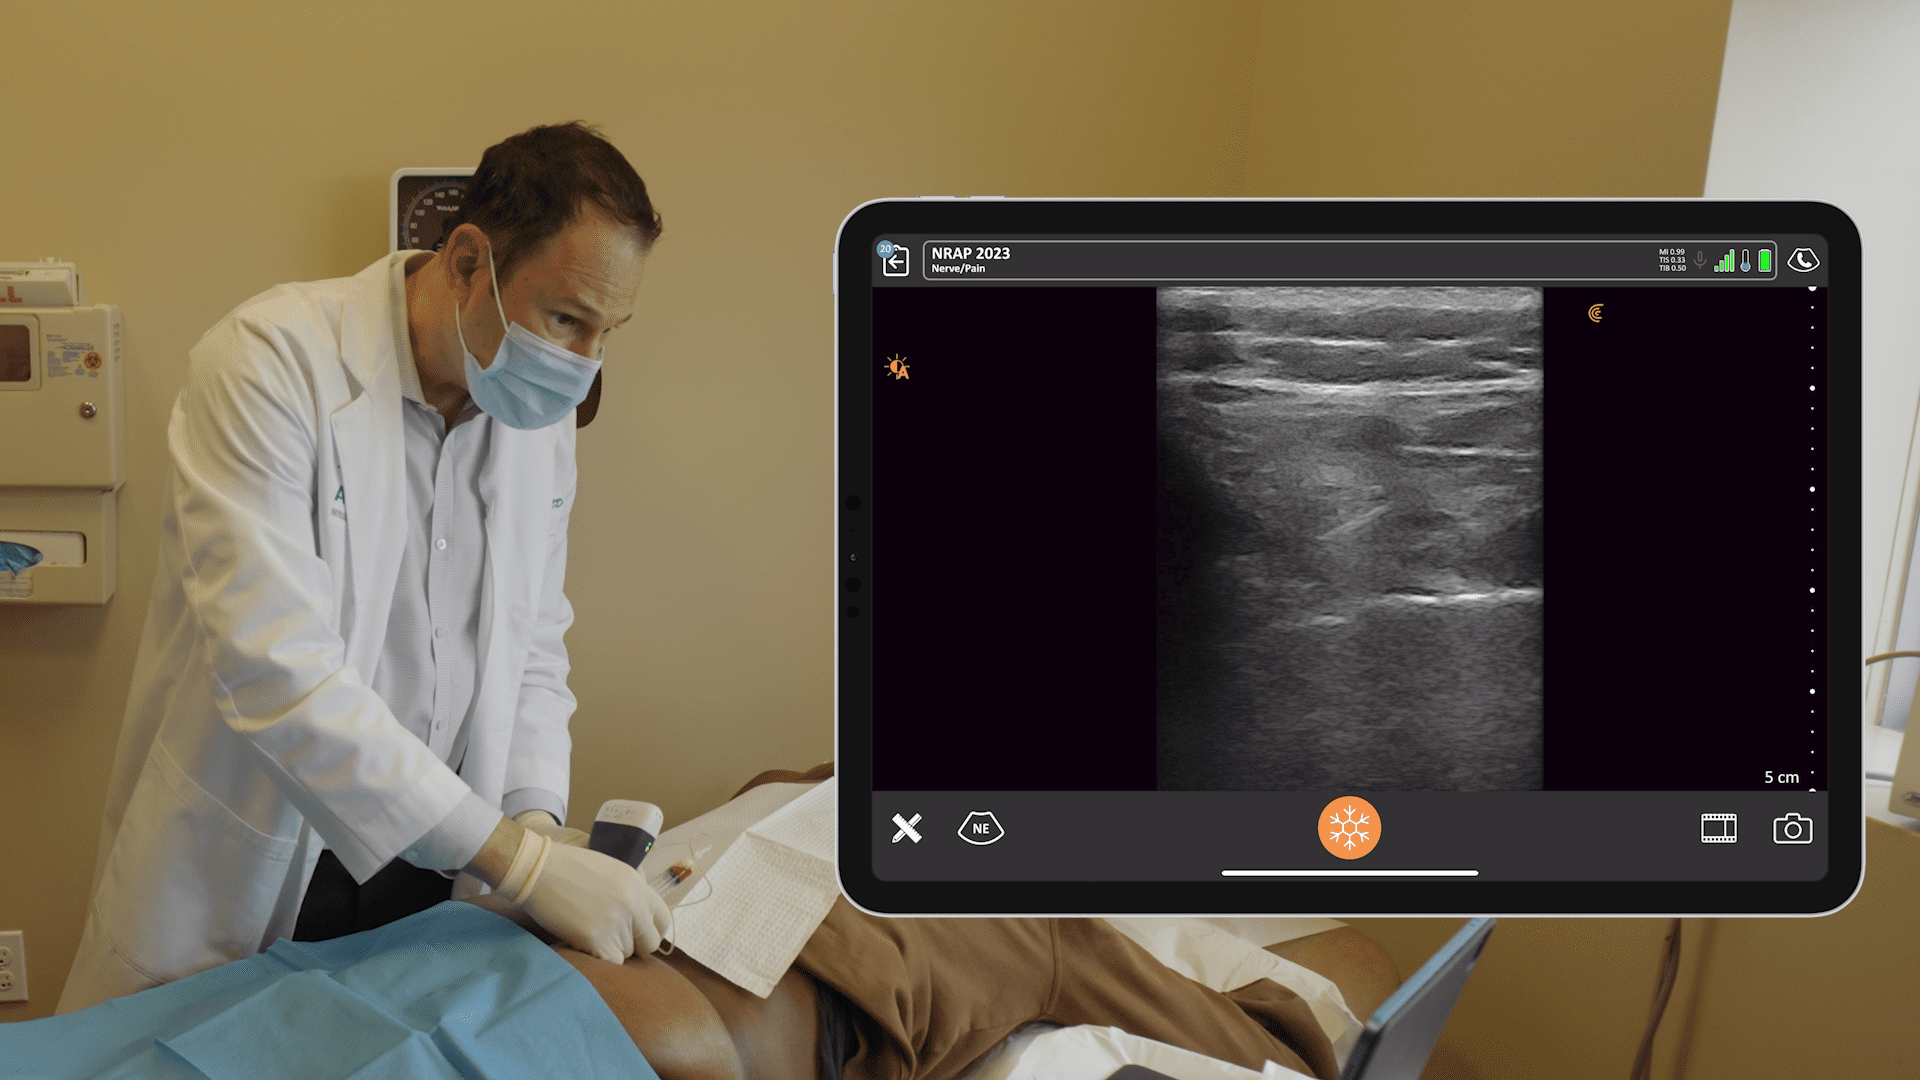
And then, we want to inject our local around our friendly faces.
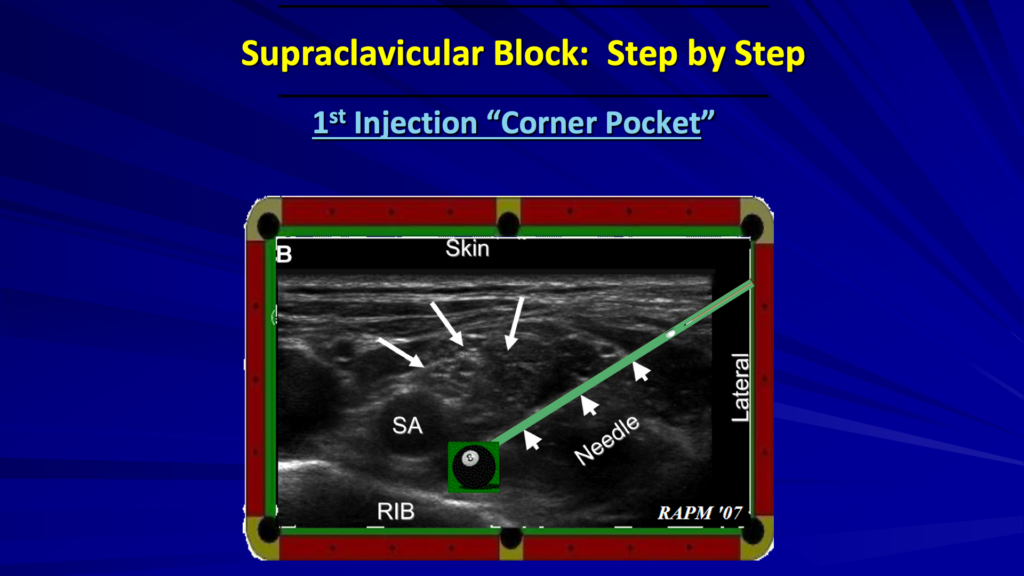
With our first injection, we’re going to go into the corner pocket just between the artery and the rib. That’s deep to the lower trunk and that’s going to lift this whole plexus up. And then we inject to get the rest of the plexus.
The procedure that I’m about to show you is for an elbow surgery, which means injecting into the corner pocket area in the lower trunk. If you’re doing the upper trunk with surgery on the thumb side, you’ll be more superficial to get the upper trunk.
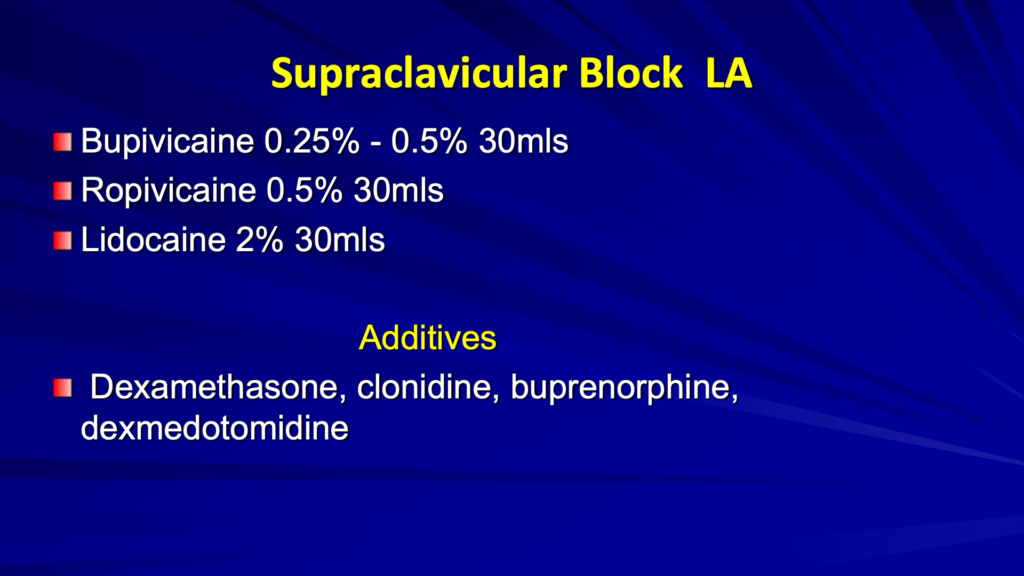
For the block, normally I use a quarter percent of bupivacaine. We’re using 30 cc. You can use a 0.5% if you want this block to last longer, or ropivacaine 0.5%, 30 cc. It’s a pretty safe block as long as you see that rib.
If you want a shorter block, a faster onset, which you may want to use in the ER, you could use 20 cc to 30 cc of lidocaine 2%.
Additives are common in anesthesia. I used to use clonidine back in the ’90s. Also, buprenorphine back in the ’90s a little bit. Nowadays, on this block, we usually use 0.25% bupivacaine and 2 to 4 milligrams of dexamethasone in our block. We’re usually giving another 4 milligrams of dexamethasone IV, to help with just post-op nausea and also for the anti-inflammatory effect. I don’t use dexmedetomidine, but some people use it for their blocks.
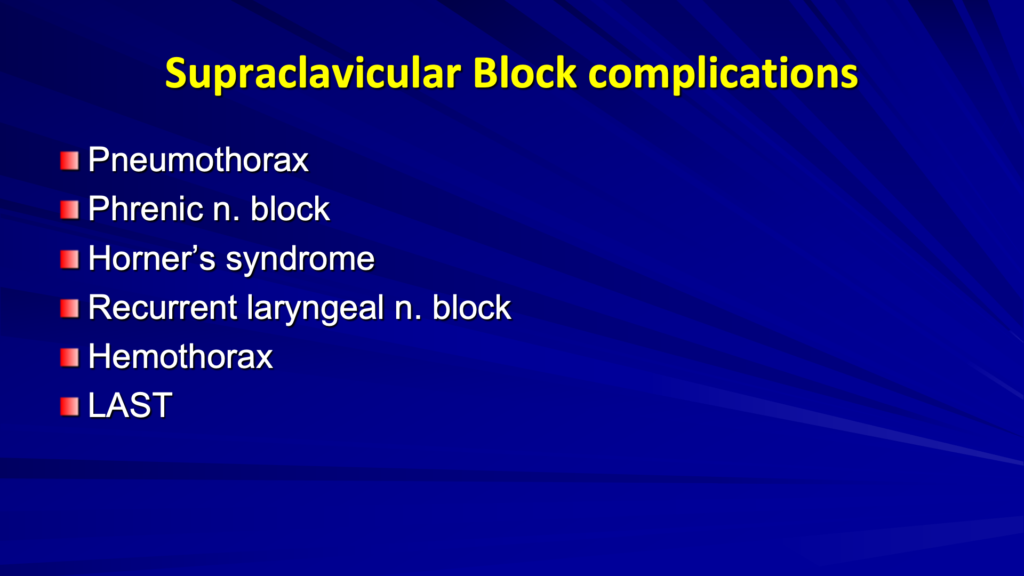
There are some risks involved with doing a supraclavicular block, including the obvious pneumothorax.
MASTER TIP: To avoid a pneumothorax, make sure you have a good ultrasound image of the rib. You’re going to be protected because if you see the needle and the rib, they’re going to be in the same plane.
There’s about a 20% incidence of a Phrenic block with supraclavicular blocks. You can also get Horner’s syndrome. With a recurrent laryngeal nerve block, you can get some hoarseness. Be careful to tell your patients not to eat a lot of food in the next three or four hours.
Local anesthetic toxicity is always a risk for any block. So, we continue to aspirate no matter what block we’re doing. I’m always using a nerve stimulator and we’re always aspirating every 3 cc to 5 cc as we’re doing our injections.
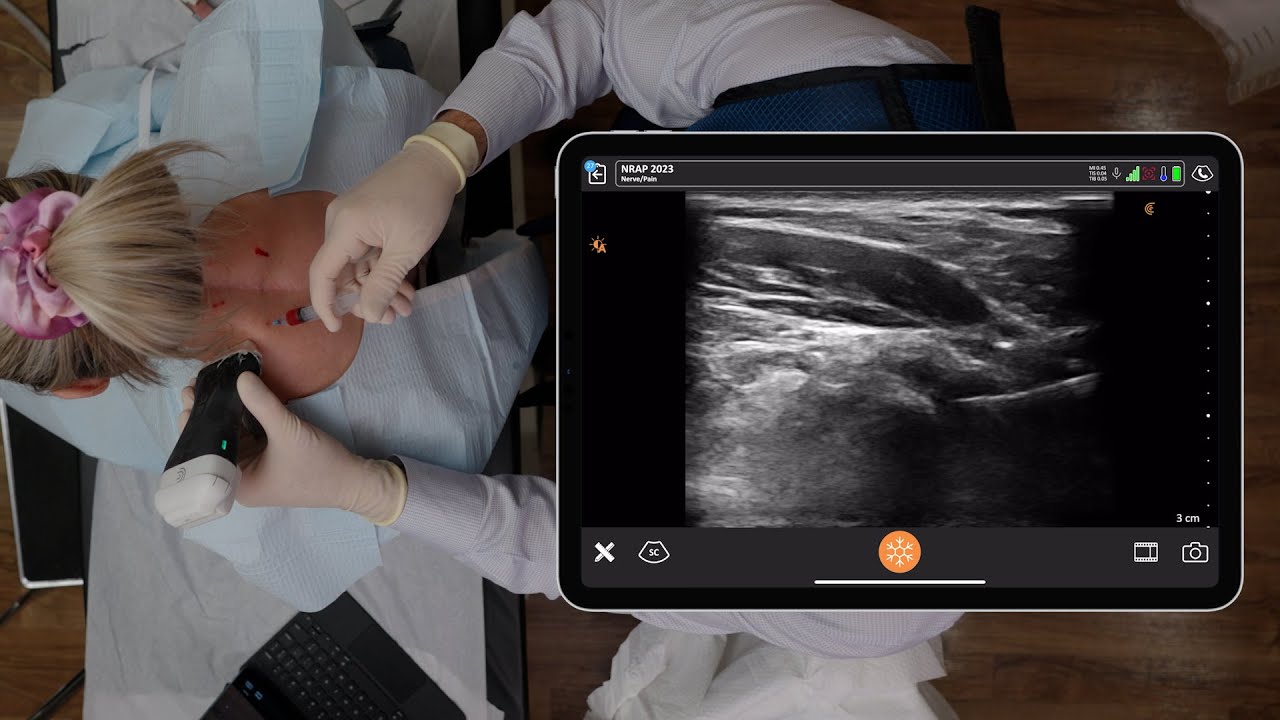
Video Demonstration of Supraclavicular Block
The patient in the following video is having elbow surgery. We have a chlorhexidine prep going. I put in a little local with a very small needle for our introduction. I like to put it all the way up to the probe.
On the right side of the video, you can see our subclavian artery, which starts below the rib. You can see our nerves, our smiley faces all spread out over here. The nerves can be in different kinds of configurations.
Watch our needle comes in kind of flat. But what I want to do is just slide under the nerves. And if I can, I’m going to slide on through. If I start getting a twitch and start running out of room, I’ll start injecting and raise these nerves up. You can see the local starting to come in, that raises the nerves up off of the rib. It gives me room to advance into the corner pocket. When we’re in the corner pocket, we start the injection.
You can see the local spreading and pushing the artery to the left, pushing the nerves over to the right and more superficial. That’s probably 10 cc. You’ll see I can just maneuver the needle a little bit, up and down. We get a U-shaped injection of local anesthetic around the plexus.
You can see the needle better as you’re adding local anesthesia. It helps the needle kind of light up as it’s bathed in fluid. You usually see the nerves a lot better too once they have some contrast with the dark local anesthetic around it.
At this point, I come right under the upper trunk between the upper and middle trunk. This comes with experience and you get comfortable doing this. I can advance the needle and open up a space and then do what I call hydro advancement and move the needle into where the local is.
MASTER TIP: For new users and trainees, you can use saline first to open space because if there’s an accident or it’s going in the wrong place, the risk is much lower. And then, you can dump the anesthetic into the space that you’ve opened up where you see the needle. You’re not going to infringe on the nerve or any vascular entities by opening it up like that. So, it’s very much a nice safety maneuver.”
Interested in Learning More Master Tips from Dr. Hickman?
As co-founder of the popular ultrasound-guided regional anesthesia education website, Blockjocks.com, Dr. Hickman is well versed with teaching his techniques to clinicians around the world. He has been using Clarius handheld ultrasound since they were first introduced in 2016.
Dr. Hickman joined Clarius for a one-hour webinar to share his master tips for performing ultrasound-guided injections “The Mobile RA: Using Handheld Ultrasound to Guide PEC and Supraclavicular Blocks Plus Intra-Articular Injections.” Watch the recording of the full webinar at your convenience.
Interested in Using Clarius Ultrasound for Your Regional Anesthesia Practice?
Dr. Hickman currently uses the Clarius L7 HD to guide nerve blocks including femoral blocks and adductor canal blocks.
Wireless and pocket-sized, Clarius scanners deliver the high-definition imaging and performance you expect from a traditional ultrasound system in a highly affordable ultra-mobile scanner. Visit our regional anesthesia specialty page to learn more about Clarius. Or book a demo for information on which Clarius system is right for you.


